Accurate registration is one of the biggest challenges in colour printmaking. Whether you are working on a reduction lino print, a multi-block lino print, or another relief print project, keeping each sheet of paper in exactly the same place is essential for clean colour alignment. Hickman Design registration pins are designed to make that process more reliable, repeatable, and easier to manage across a full print run.
In this guide, we will show you how to set up Hickman Design registration pins, how to prepare your board and paper, and how to use tabs to register each sheet consistently.
Table of Contents
What you will need
Before you begin, gather the following tools and materials:
- Flat base board, ideally plywood or MDF cut to size, around 10 mm thick, if using the screw-down method
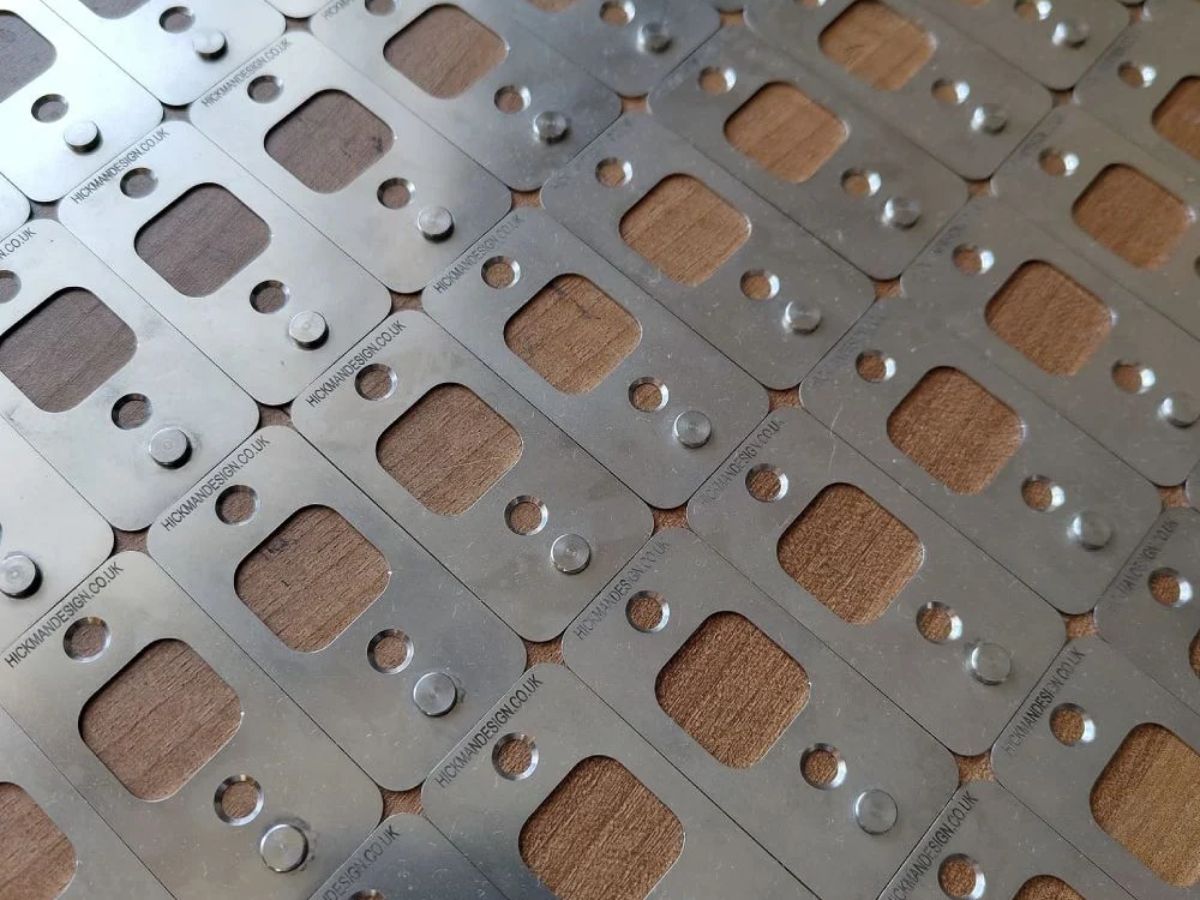
- Hickman Design registration pins
- Suitable screws, such as the supplied 8 mm screws, if using the screw-down method
- Offcuts of lino, card, or similar materials to build a temporary frame around the lino block
- Square and steel ruler
- Drill with a 1.5 mm bit for pilot holes
- Screwdriver for hand-tightening
- Low-tack tape for attaching paper tabs or securing the pins for a temporary setup
- Clamps
- Printing paper for your edition
- Your lino block
Choose your setup method
Hickman Design registration pins can be used in two main ways.
Screwed-down setup
This is the best option for longer print runs, repeat editions, or situations where you want a more solid and permanent registration board. Once fixed in place, the pins stay consistent and are less likely to shift.
Watch our quick video guide on screwing down Hickman Design registration pins.
Taped setup
This is a quicker temporary method for short print runs, testing layouts, or more flexible studio setups. Instead of screwing the pins down, you tape them firmly to the board, press bed, or another flat surface. This works well when you do not want to drill into a base board.
Step 1: Prepare the base board or printing surface
If you are using the screw-down method, start by cutting a base board to size. Plywood or MDF around 10 mm thick works well. The board should be flat, square, and large enough to hold your lino block, the registration pins, and a comfortable paper margin around the image area.
If you are using the taped method, you do not necessarily need a separate base board. The pins can be taped directly onto your press bed, printing board, or another flat working surface, as long as it is stable, square, and gives you enough room for the lino, paper, and tabs.
A flat and consistent surface is important either way, because any small movement or misalignment at this stage can affect the whole print run.
Step 2: Mark the pin position
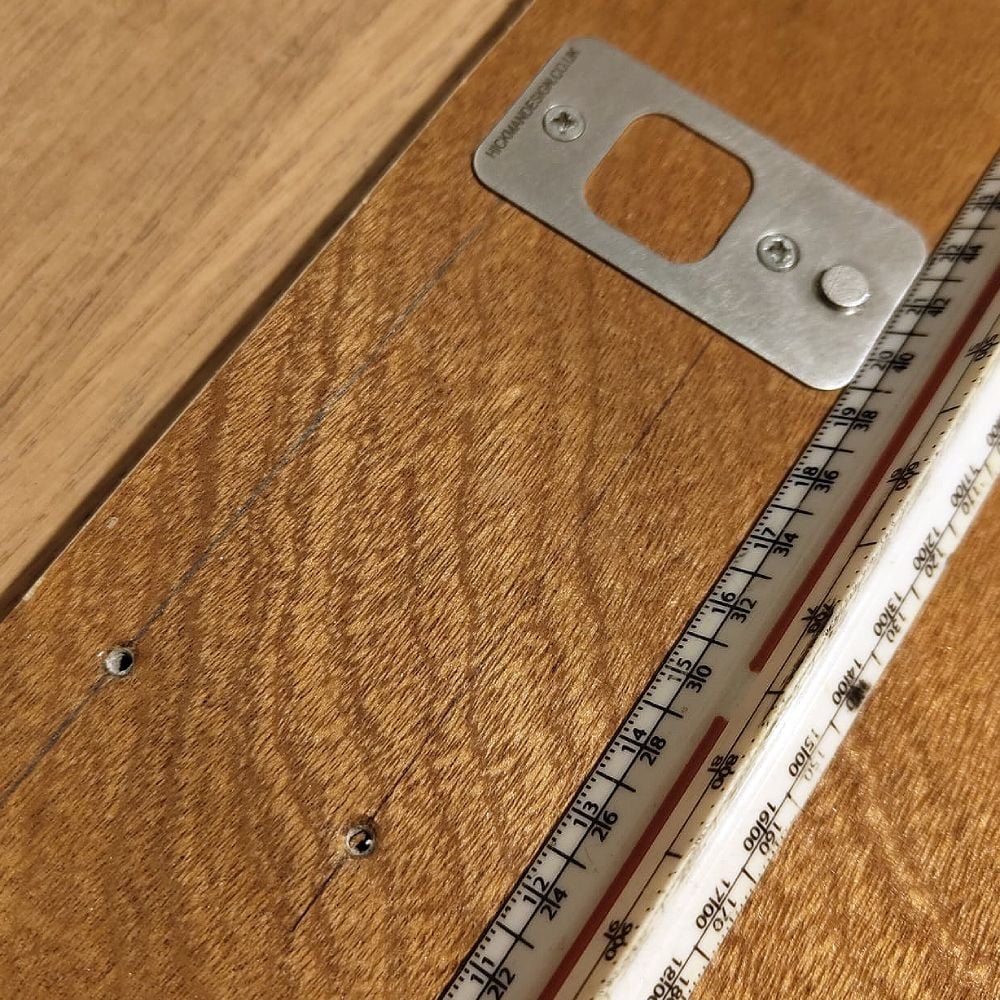
Marking lines to square up the registration pins
Using a square and steel ruler, draw a straight reference line parallel to the top edge of the lino frame. This is the line your registration pins will sit on.
Position the line far enough away from the image area to allow for your lower paper margin and the paper tabs. Do not crowd the image. A little extra margin makes the paper easier to seat properly on the pins without interfering with the printed area.
Take your time here. The frame, pin line, and paper edge all need to work together, so accuracy at this stage makes everything easier later.
Step 3: Fix the pins in place
Option A: Screwing the pins down
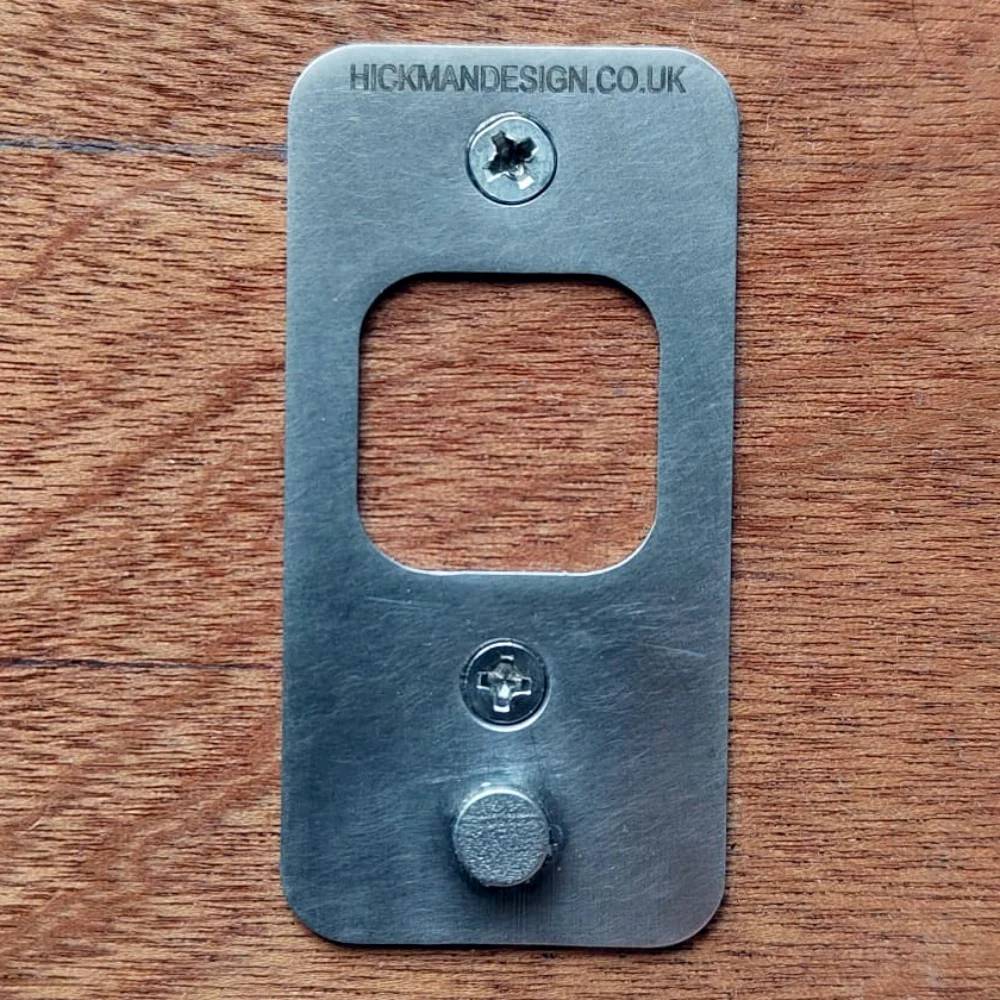
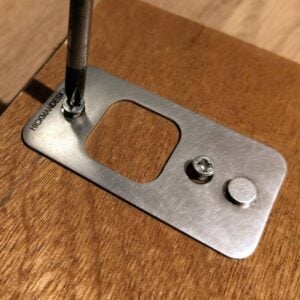
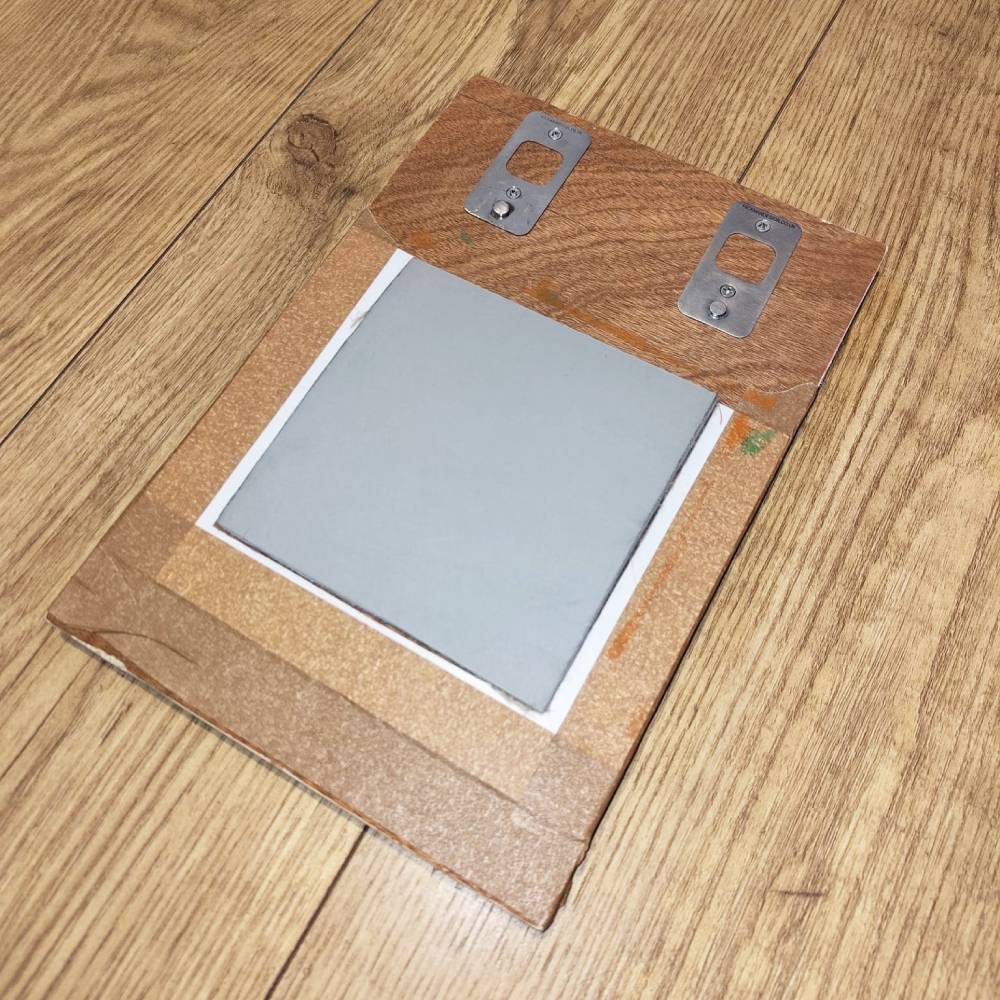
Registration pins screwed down
Place each registration pin on the reference line and mark the top and bottom fixing holes with a cross. Use the straight edges of the pin and your ruler to keep everything square.
Remove the pins before drilling so they do not get damaged.
Drill the top pilot holes first using a 1.5 mm drill bit. Drill only to the depth needed for the supplied screws, around 8 mm if using the screws provided.
Important: Make sure to countersink the top of the drilled hole in the mounting surface so the screw head sits flush with the pin face. You can use a drill bit for this if on wood.
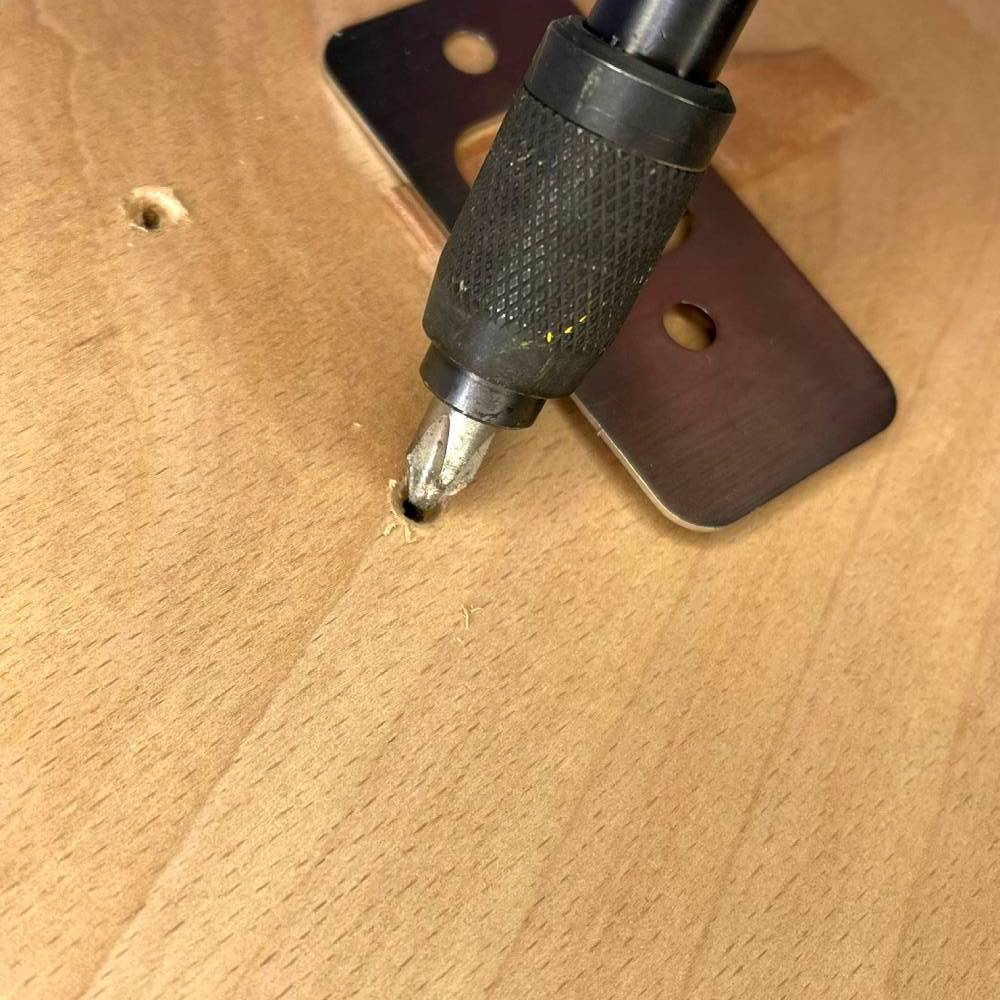
Using a drill bit to countersink wood to help the screw sit flush with the metal. Make sure to clean away any debris after and the edges of the hole are free of any frayed wood.
Place the pins back onto the board and hand-screw the top screws in place using a screwdriver. Tighten them enough to hold the pins, but leave a little movement so they can still be nudged if needed.
Re-check the alignment carefully. Once you are happy, mark and drill the bottom pilot holes. Drill slowly and carefully to avoid the bit wandering.
Refit the pins and insert both screws loosely at first. Once both pins are confirmed as flush, square, and in line with each other, tighten them by hand.
Do not overtighten. A snug fit is enough.
Option B: Taping the pins down
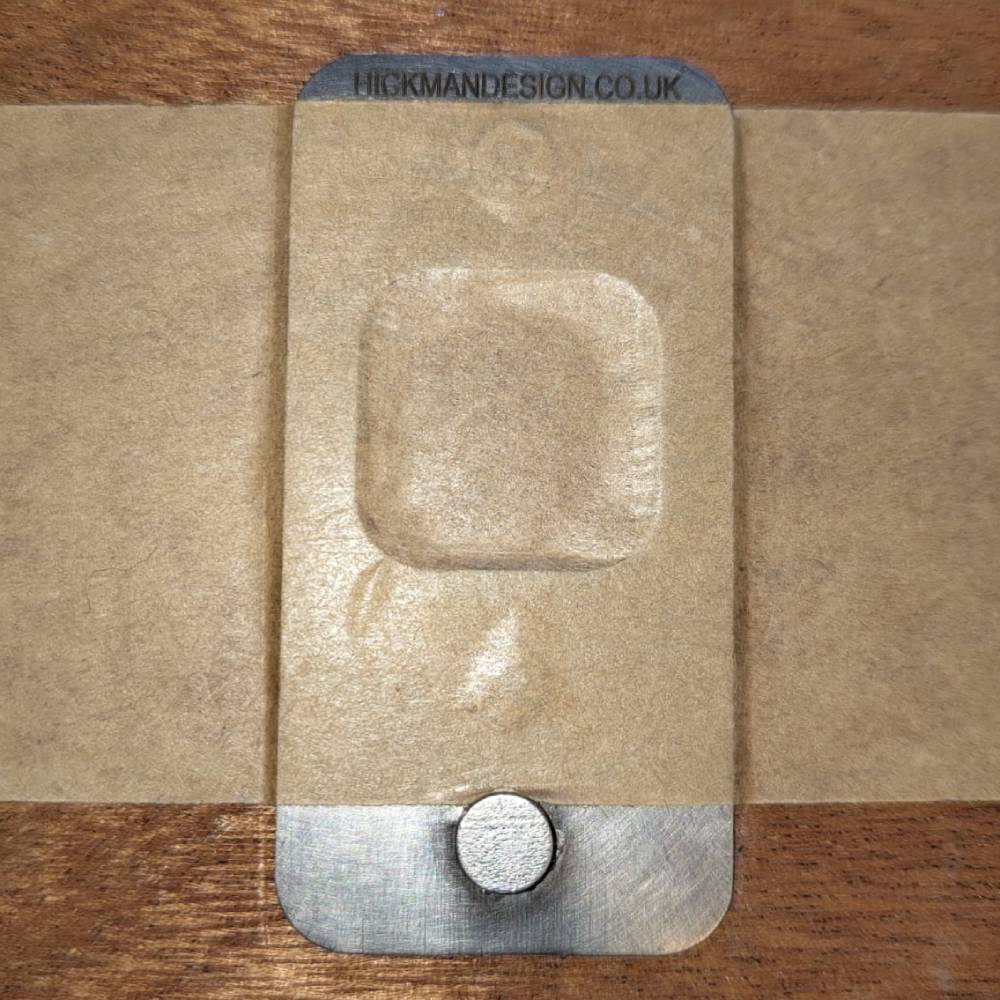
Registration pins taped down
If you are using a taped setup, place the registration pins in position on your reference line and make sure they are square and aligned.
Tape over the large square opening and also tape across the top half of the pin, flattening the tape firmly against the board, press bed, or other working surface. Press it down well and give the pin a gentle wiggle to check there is no movement.
This method is best suited to short print runs, temporary setups, or testing. It is quick and effective, but not as robust as a screwed-down board for repeated long-run use.
Step 4: Build a snug frame for the lino block
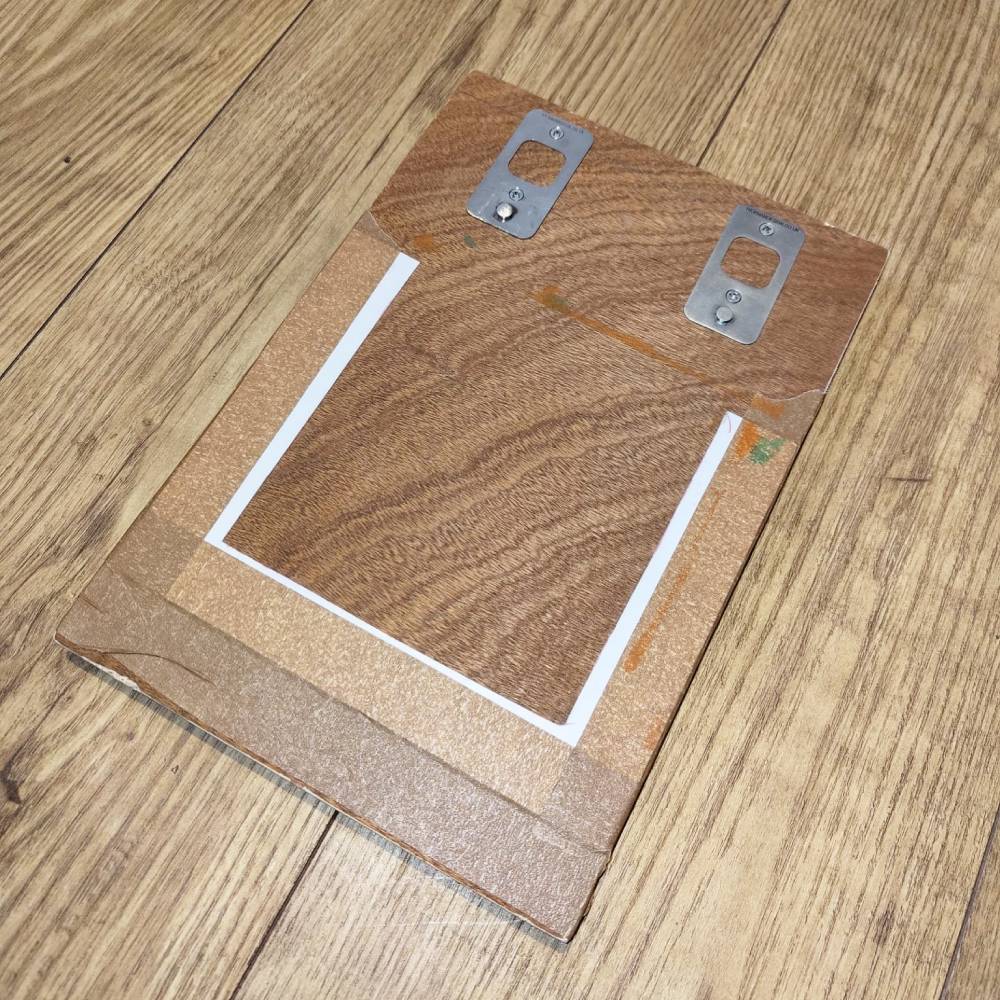
Frame made from card to place lino block into to stop movement
Use offcuts of lino, card, or similar materials to build a temporary frame around your lino block on the base board or flat working surface. Tape or fix these pieces in place so the lino sits snugly inside the frame.
The purpose of this frame is to keep the lino square and stop it creeping during printing. It also makes it easier to return the block to exactly the same position each time.
Mark a clear top edge on both the frame and the board or working surface so the orientation always stays the same. This is especially useful if you remove and replace the lino during the process.
Step 5: Test the lino and surface setup
Lino block placed in frame to test before printing
Place your uninked lino block back into the frame and check that everything sits where it should. Make sure the block drops in cleanly and does not shift.
This is also the time to do a dry test with a spare sheet of paper before preparing the full edition. A simple test run helps confirm that the paper will clear the image area, the tabs will have enough room, and the sheet will seat properly on the pins.
Step 6: Register the paper with tabs
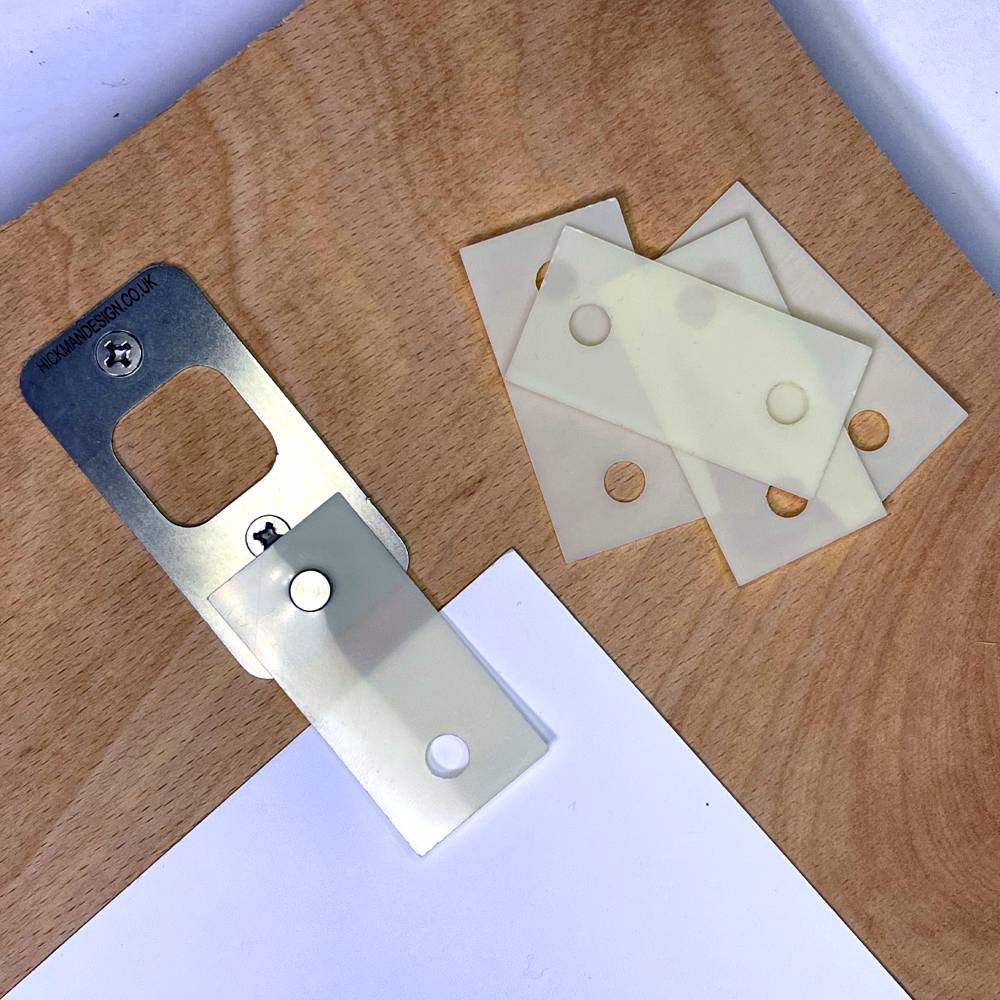
Align the tabs to the sheet once attached to the pins.
With the uninked lino in the frame, place one sheet of your printing paper over the lino in the position you want for the final print. If needed, gently clamp the sheet to stop any drift while you prepare the tabs.
Slide the sheet onto the registration pins so that it sits consistently against them. Keep the sheet square to the lino frame and check that the image area is positioned correctly within the paper margins.
Once the sheet is sitting exactly where you want it, place small tabs onto the pin heads. Keep the tabs square to the base of the pins. Tape each tab to the underside of the sheet using low-tack tape.
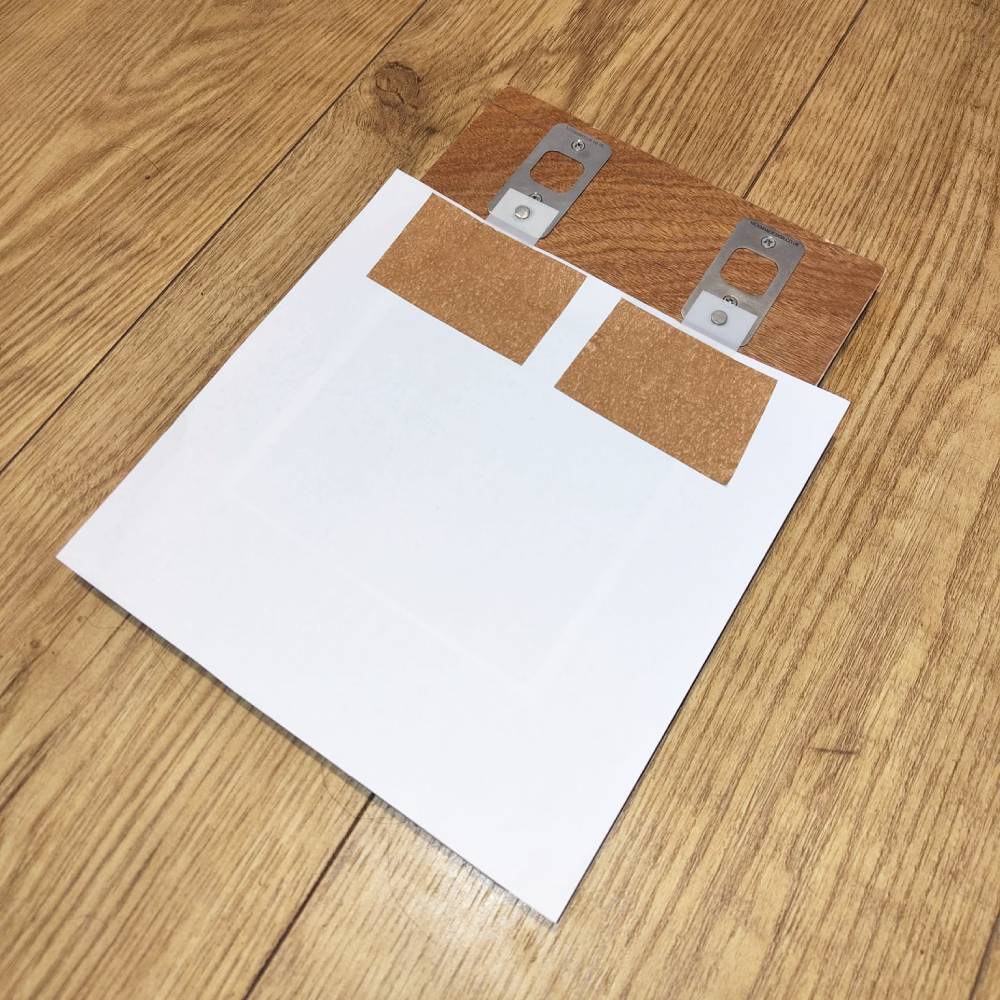
Paper aligned to paper and attached to registration pins
When done properly, the tabs will allow the sheet to drop back onto the same pin position every time.
Remove the sheet carefully and repeat the process for every sheet in the edition so all tabs are positioned in the same way.
If you need a larger or smaller lower margin, adjust the paper placement before fixing the tabs. The tab position controls where the paper will sit on future pulls, so this is the moment to get it right.
Step 7: Print with controlled engagement
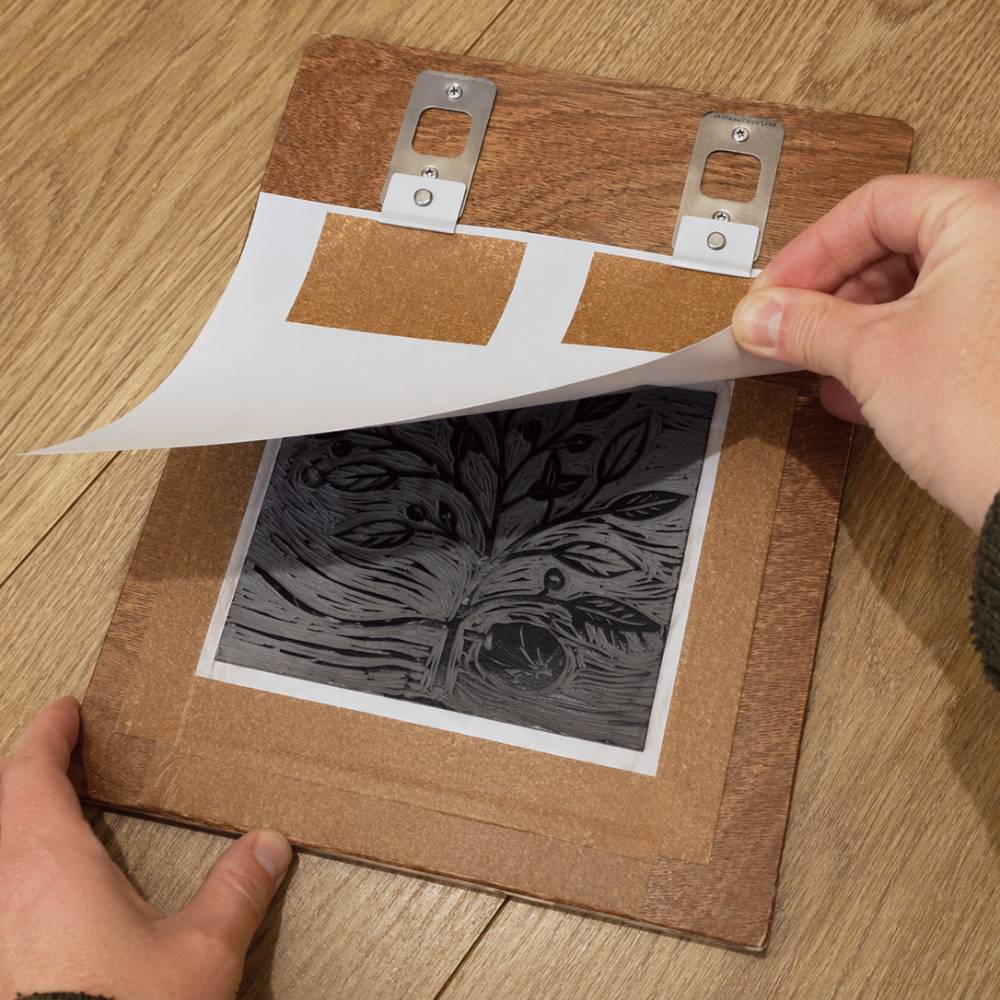
Inked lino block aligned using Hickman Design registration pins
Once your tabs are attached and your lino is inked, place the lino back into the frame.
To print, hold the sheet by the tabbed edge and lower it onto the pins. Use one hand to engage the tabs onto the pins and the other to guide and support the paper as you lay it down over the lino.
This controlled engagement helps prevent skewing and keeps placement consistent across the edition.
You can then print using a baren by hand or run the setup through a printing press, depending on your process.
If you are using a board with screwed-down registration pins on a press, make sure the press height is adjusted appropriately for the added thickness of the board and fittings.
Step 8: Repeat for each colour layer
For multi-colour printmaking, the real value of registration pins comes from repeating the same paper placement across each layer.
As long as your board or working surface, lino placement, and tabs all remain consistent, each sheet should return to the same position for each new colour.
This makes Hickman Design pins especially useful for reduction prints, multi-block prints, and any method where accurate layer-to-layer alignment matters.
Quick checks and good practice
A few simple habits will help improve accuracy and repeatability:
- Keep everything square, including the frame, the pin line, and the paper edge
- Use 1.5 mm pilot holes for most small screws
- Leave a generous lower margin so the sheet can fully seat on the pins without crowding the image
- Mark the orientation on the base board or working surface, frame, and underside of the lino so nothing gets flipped by mistake
- Drill the top holes first, fix lightly, then drill the bottom holes for better accuracy
- Wipe ink from the pin heads during a run so the tabs continue to seat cleanly
- Do a dry test before starting your full edition
Common mistakes to avoid
One of the most common mistakes is not leaving enough margin for the tabs and pin placement. If the paper is too close to the image area, it becomes harder to seat the sheet properly without interference.
Another common issue is failing to keep the frame and pin line square. Even a small misalignment here can affect every print in the run.
It is also easy to overlook orientation. If the lino, frame, or board gets turned around accidentally, registration can drift. Clear top marks on each part help avoid this.
Finally, if you are drilling pilot holes, do not rush. Drilling the top holes first and checking the fit before drilling the bottom holes gives a more accurate final result.
Why use Hickman Design registration pins and tabs?
Hickman Design registration pins and tabs are a practical way to improve consistency in printmaking. They help reduce guesswork, speed up repeat placement, and make it easier to handle multi-layer printing with confidence.
For short runs, they can be taped in place quickly. For longer runs and repeat use, they can be screwed down to form a sturdy and dependable registration setup.
Used carefully, they can make colour alignment far easier to manage and help you produce cleaner, more consistent prints across an edition.
Final thoughts
Good registration is not just about accuracy. It also gives you confidence while lino printing. Once your setup is built properly and your tabs are attached consistently, you can focus more on inking, colour, and the print itself rather than constantly second-guessing paper placement.
Hickman Design registration pins and tabs offer a simple but effective way to build a repeatable printmaking setup, whether you are working on a short experimental run or a longer edition.