Last Updates Published: April 13, 2026
Lino Printing Process: Step-by-Step Guide for Beginners
If you want to learn the lino printing process, this guide walks you through each stage in a clear, beginner-friendly order. From choosing materials and setting up your workspace to carving, inking, printing, and drying, you will see how each part of the process fits together.
Whether you are completely new to linocut or looking to improve your results, this page is designed to help you print with more confidence at home. It brings the key stages together in one place, with practical tips and links to more detailed guides where needed.
What Exactly is Lino Printing?
Lino printing, also known as linocut or linoleum block printing, is a relief printmaking technique. You carve a design into lino, roll ink onto the raised surface, and transfer the image onto paper or fabric using pressure. The parts you cut away do not print, while the uncut surface holds the ink and creates the final image.
A simple way to think of it is as a handmade stamp. Lino printing is popular with beginners because it is generally easier to carve than wood, while still allowing for bold shapes, fine detail, and repeatable prints. In this guide, we are focusing on the basic single-colour lino printing process, which is the best place to start when learning how to lino print.
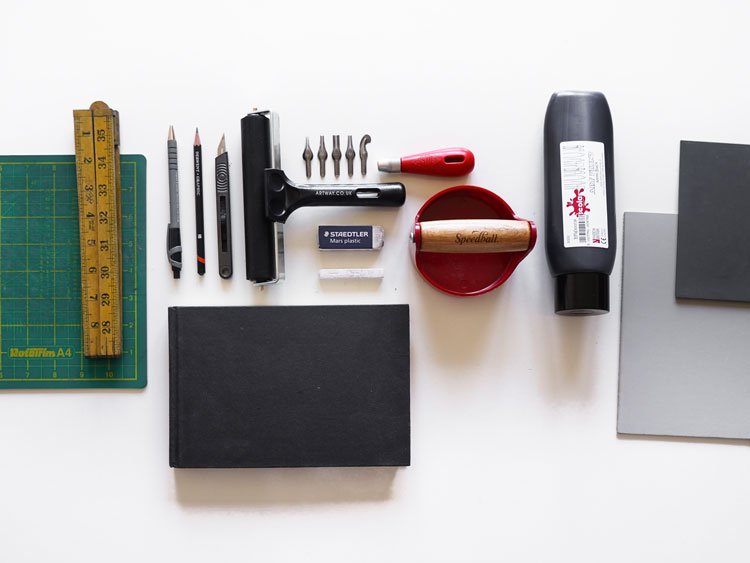
You do not need a press to begin. A roller, some ink, a lino block, and a simple hand-printing tool such as a baren or wooden spoon are enough to get started. If you want a broader introduction to the medium, you can also read our guide on what lino printing is.
The Lino Printing Process: A Complete Overview
The lino printing process usually follows six main stages. Once you understand this order, the whole method becomes much easier to follow:
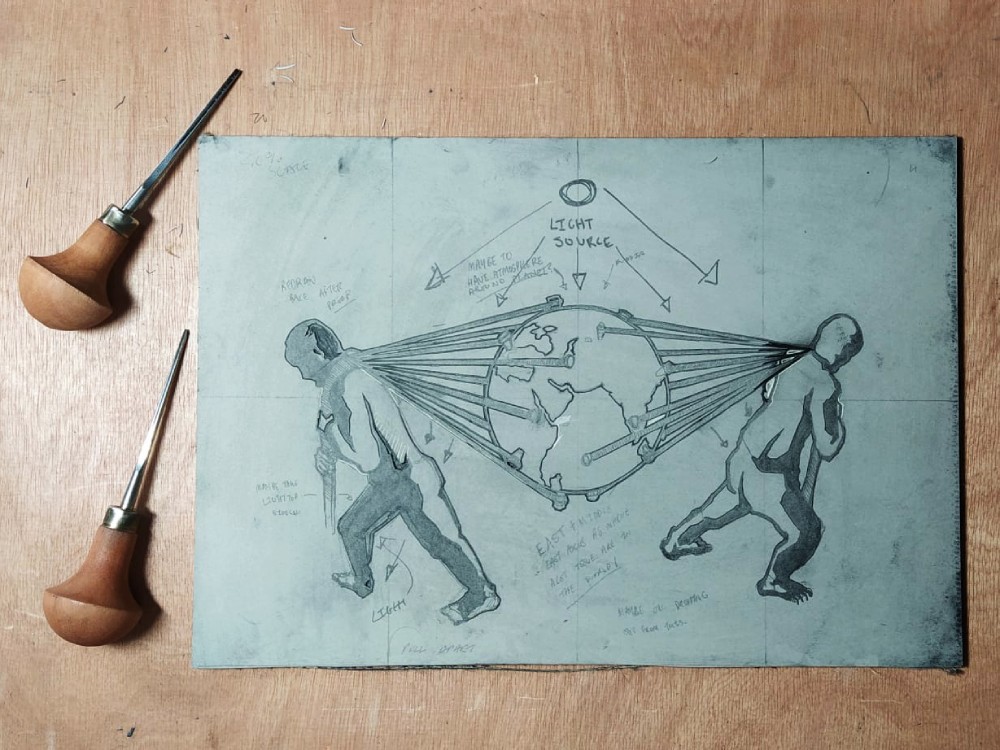
- Designing Your Lino Print: Planning and sketching your idea.
- Transferring Your Design: Moving the image onto the lino block.
- Carving the Lino: Cutting away the areas that will not print.
- Inking the Block: Rolling an even layer of ink onto the raised surface.
- Printing Your Linocut: Applying pressure to transfer the image onto paper.
- Clean Up and Drying: Finishing the process properly and allowing the print to dry.
If you are wondering how to do lino printing at home, these are the core stages you will follow each time. Below, we will break down each part of the lino printing process in more detail so you can build confidence and get better results with every print.
Table of Contents
Monsters From The ID – Linocut on Zerkall Paper