
Last Updates Published: March 11, 2022

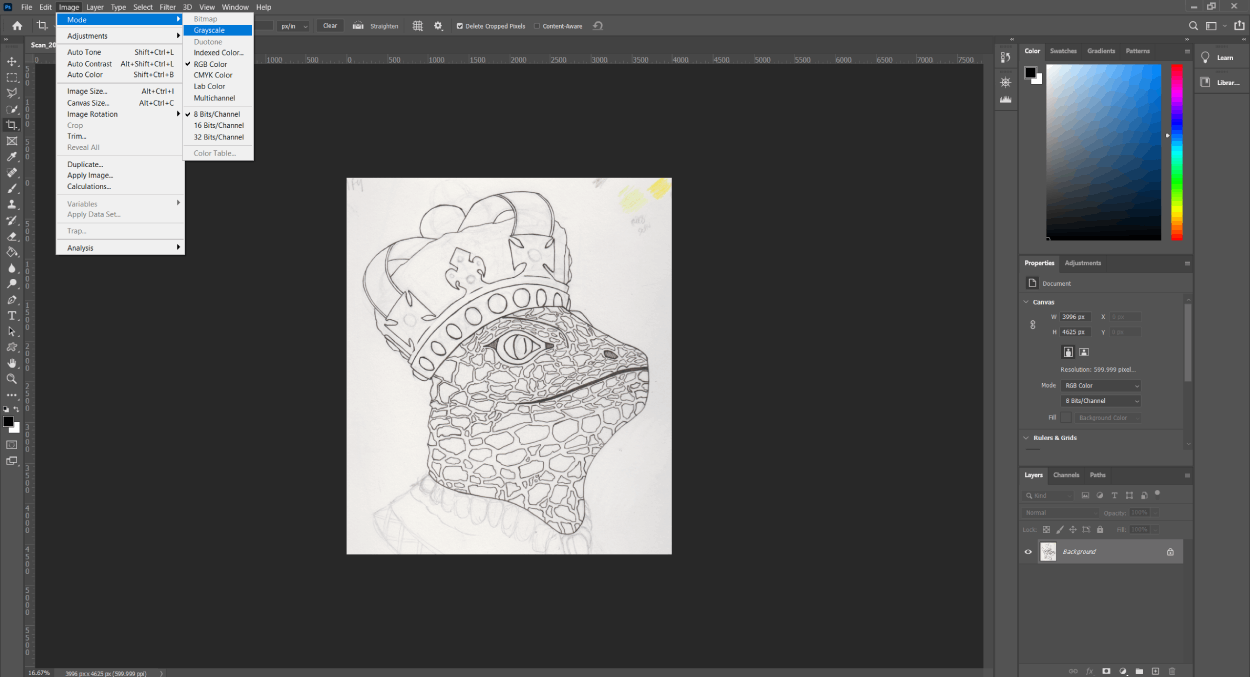
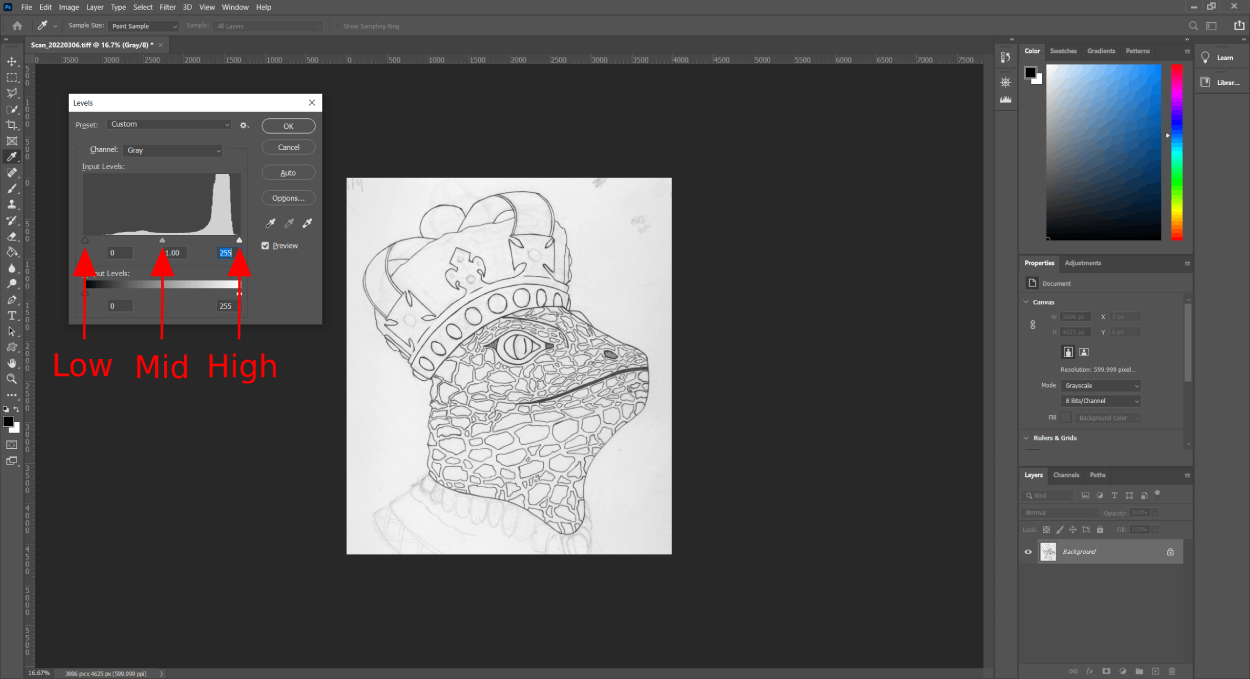
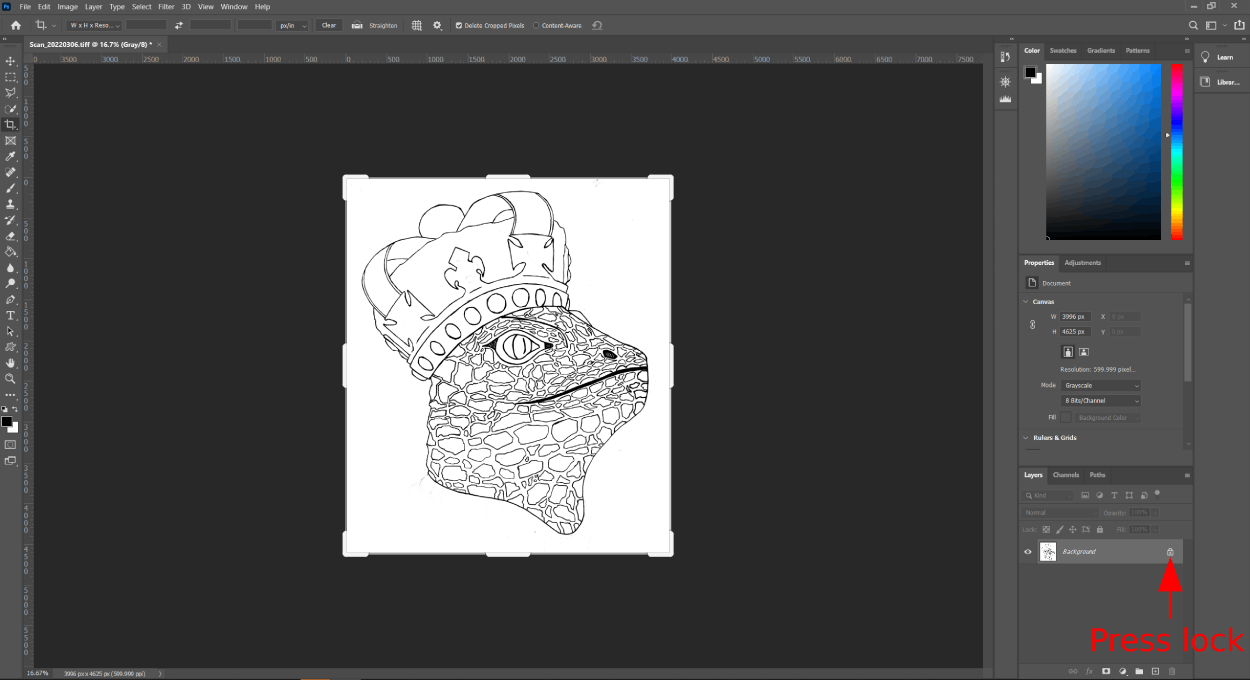
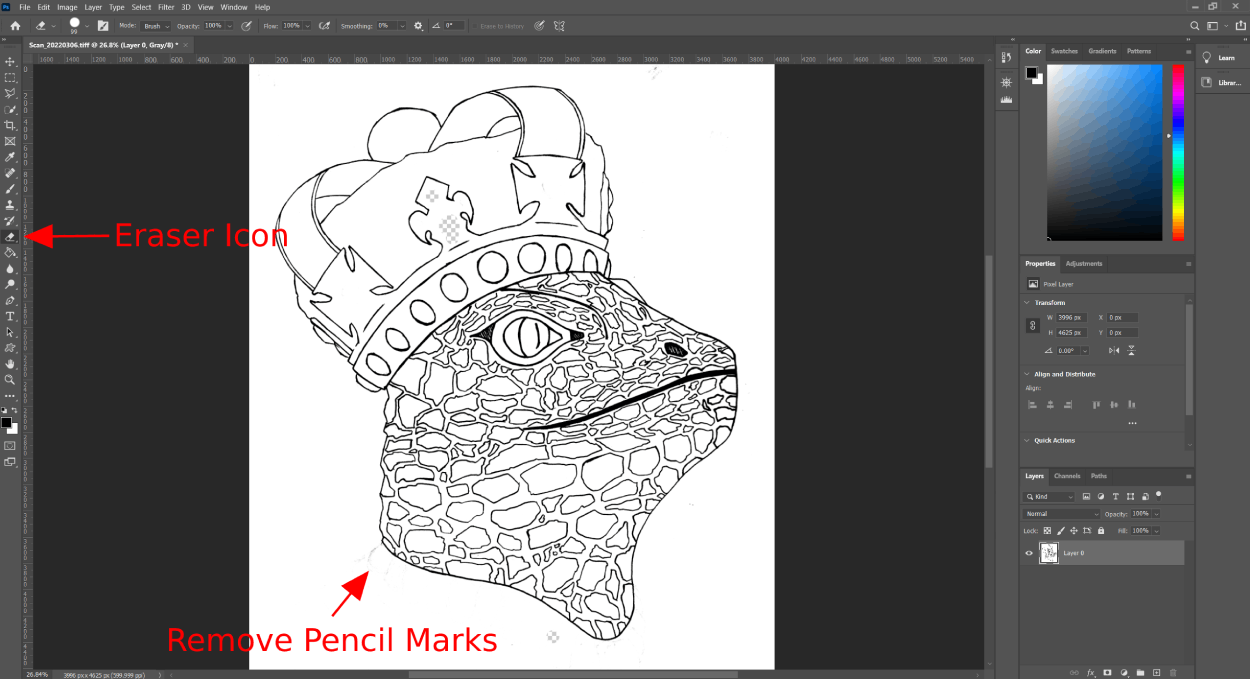
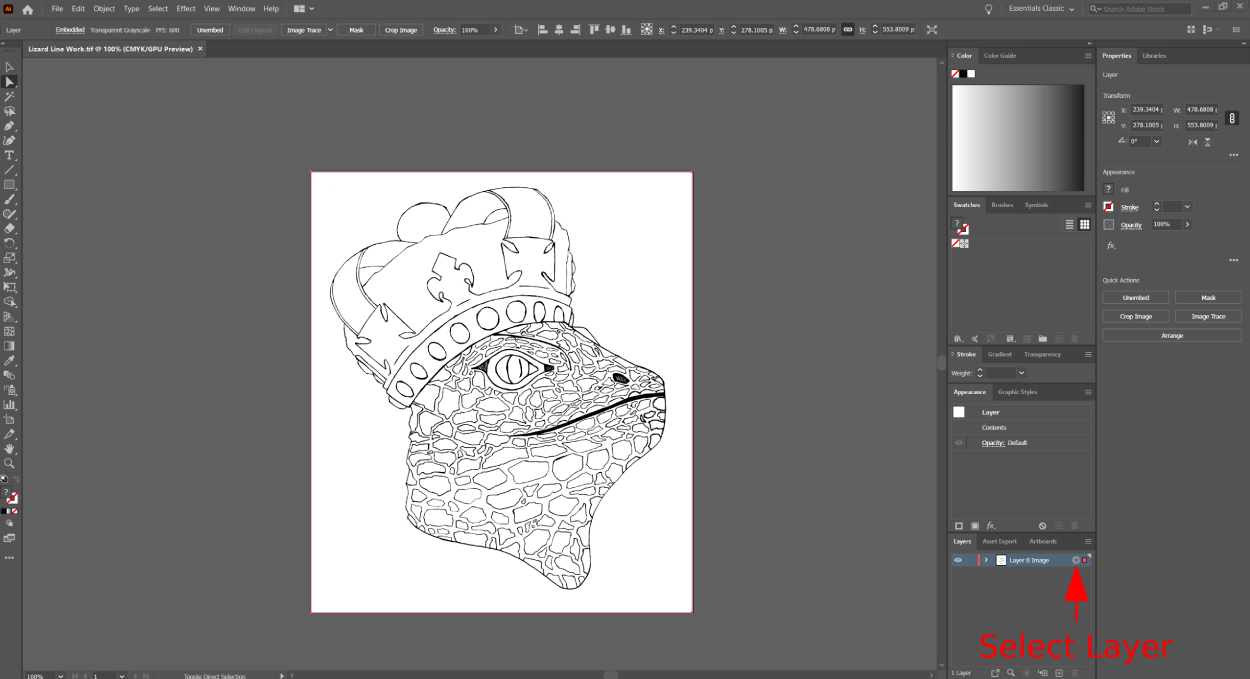
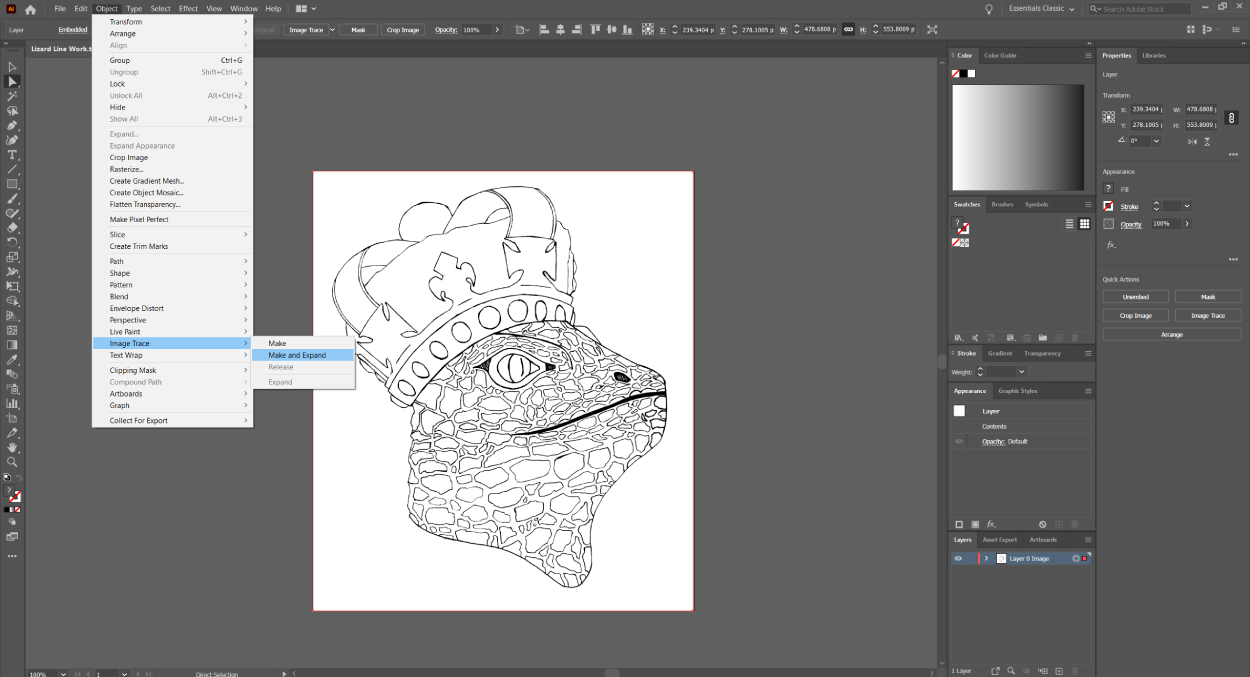
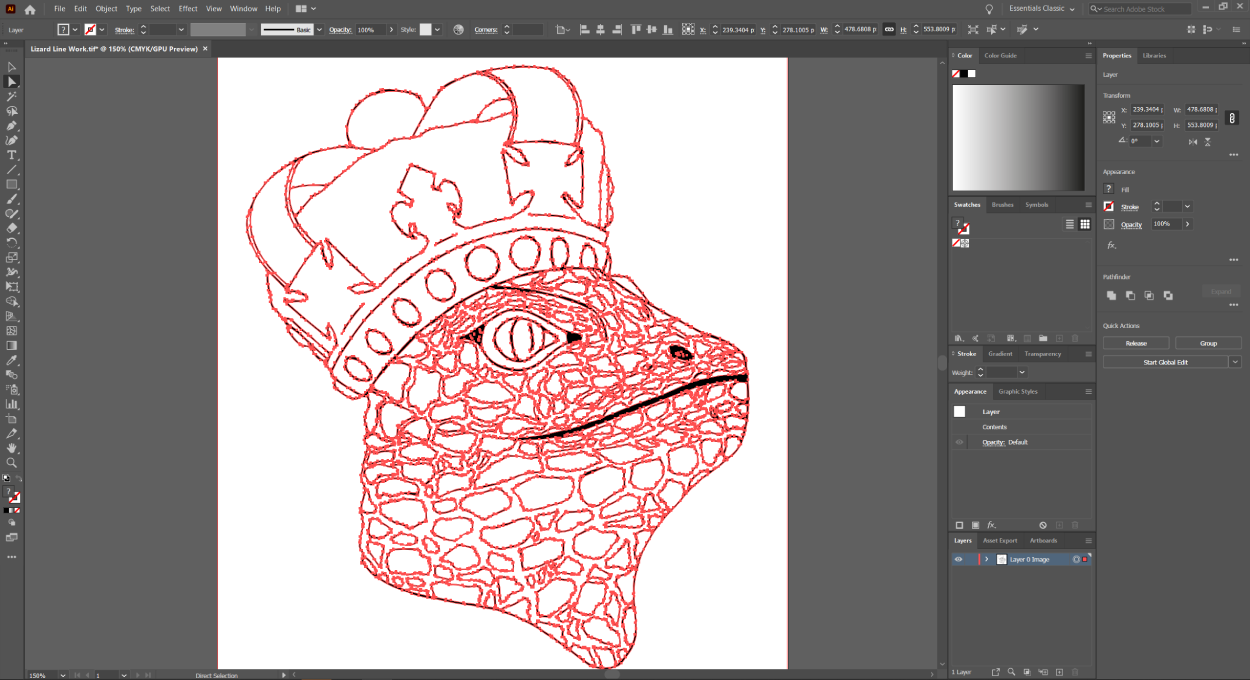
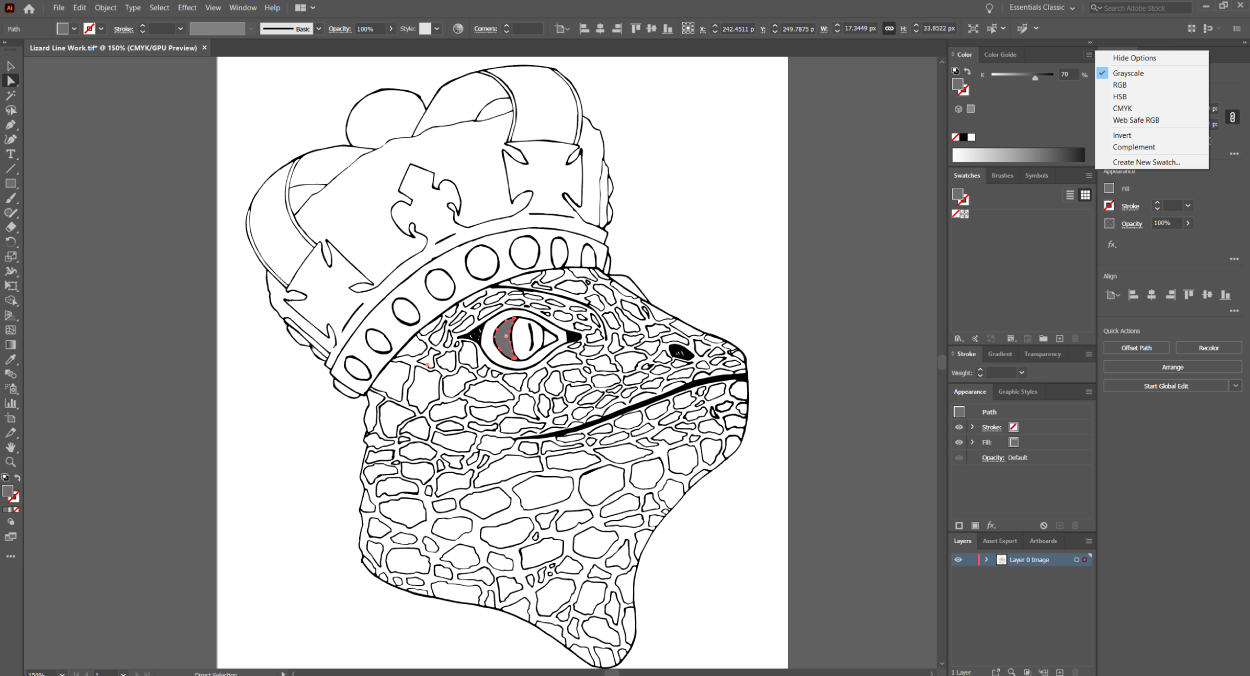
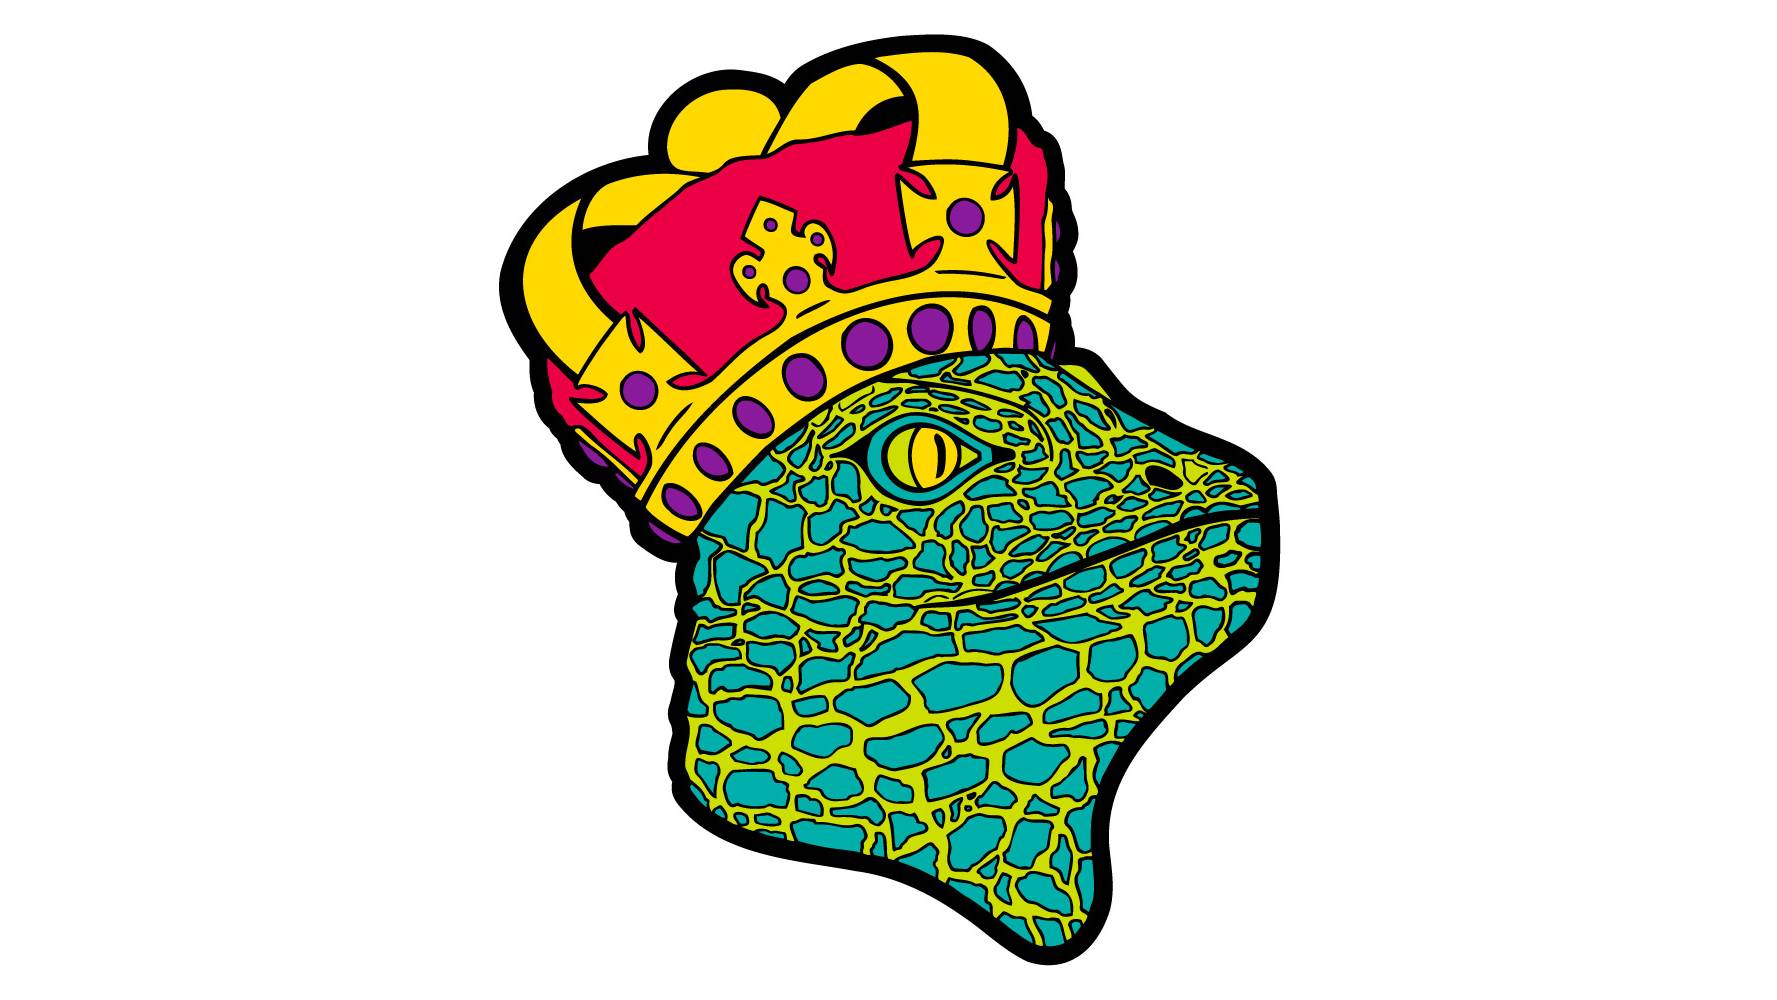
How to Turn Sketch into Digital Artwork?

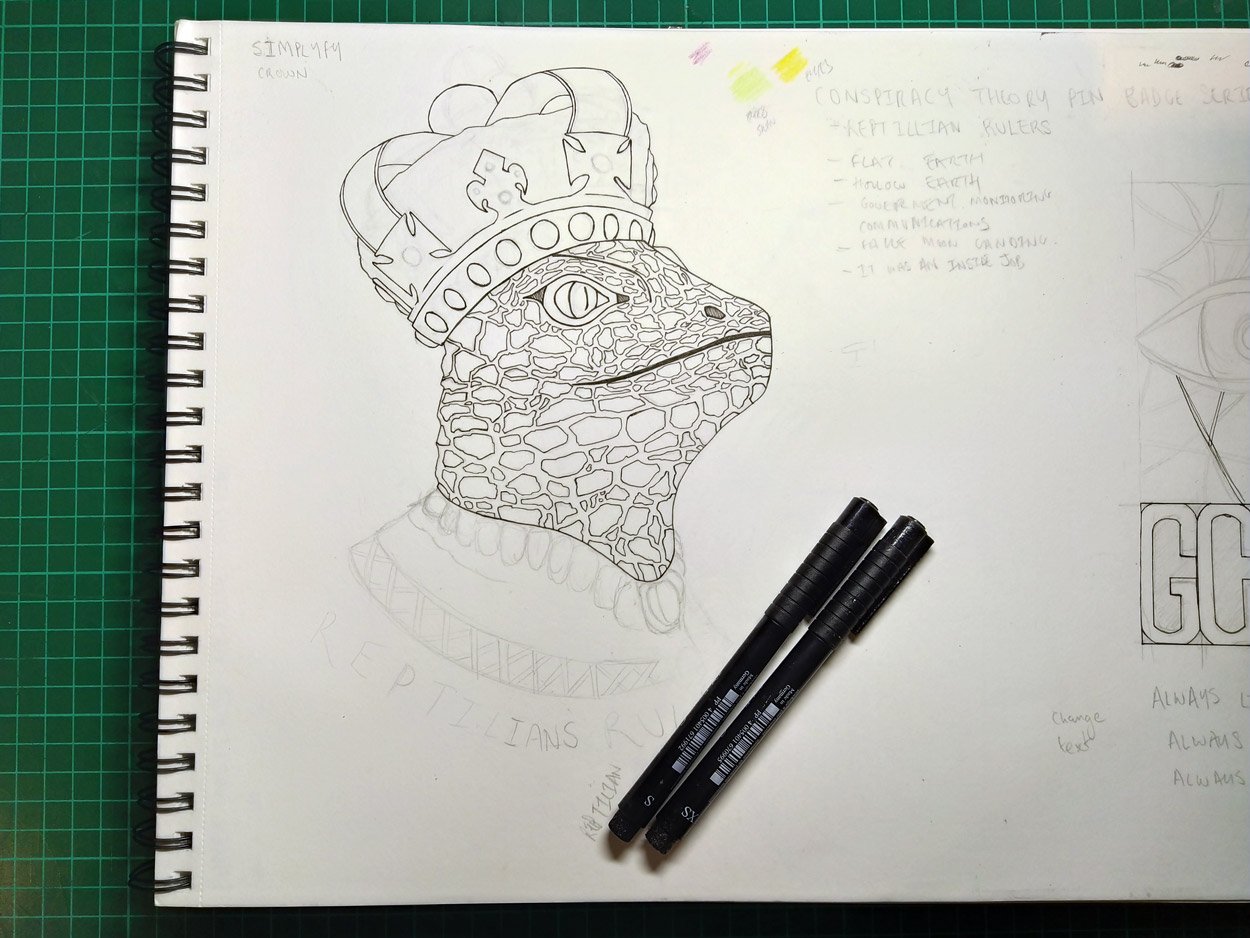
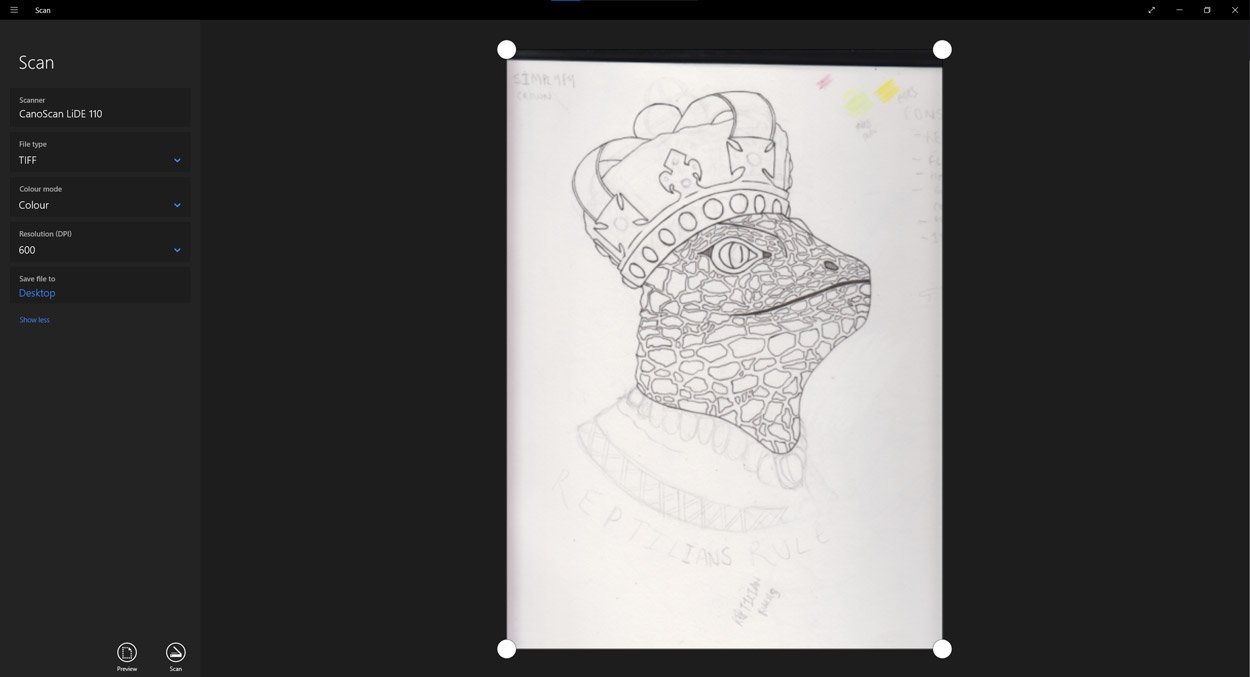
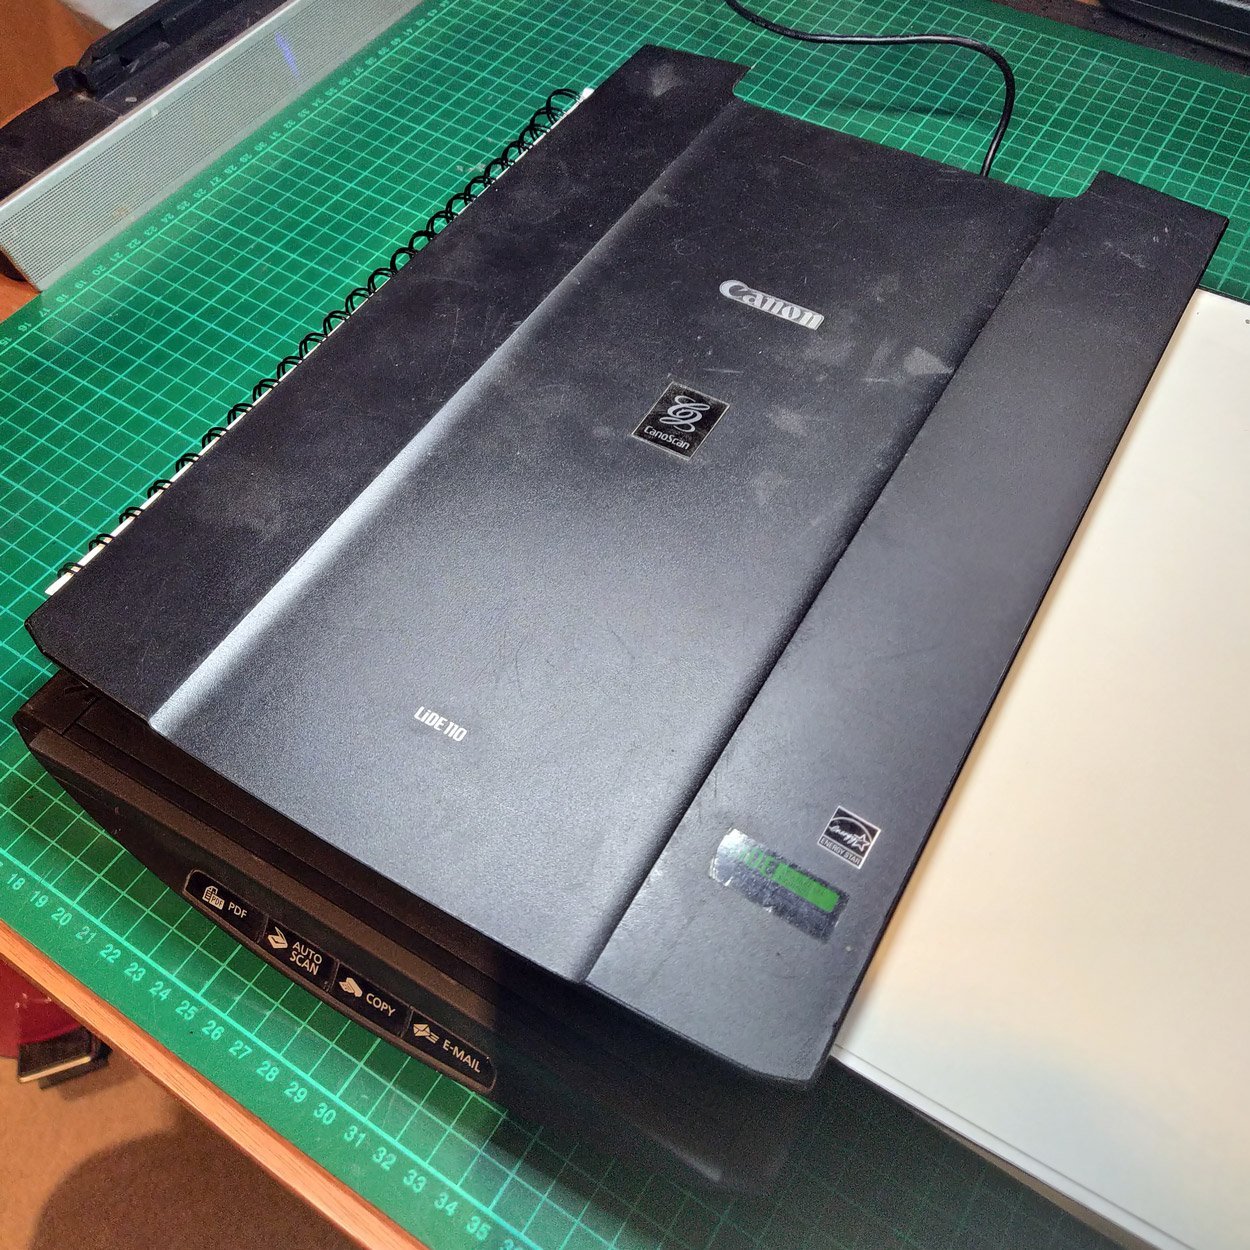
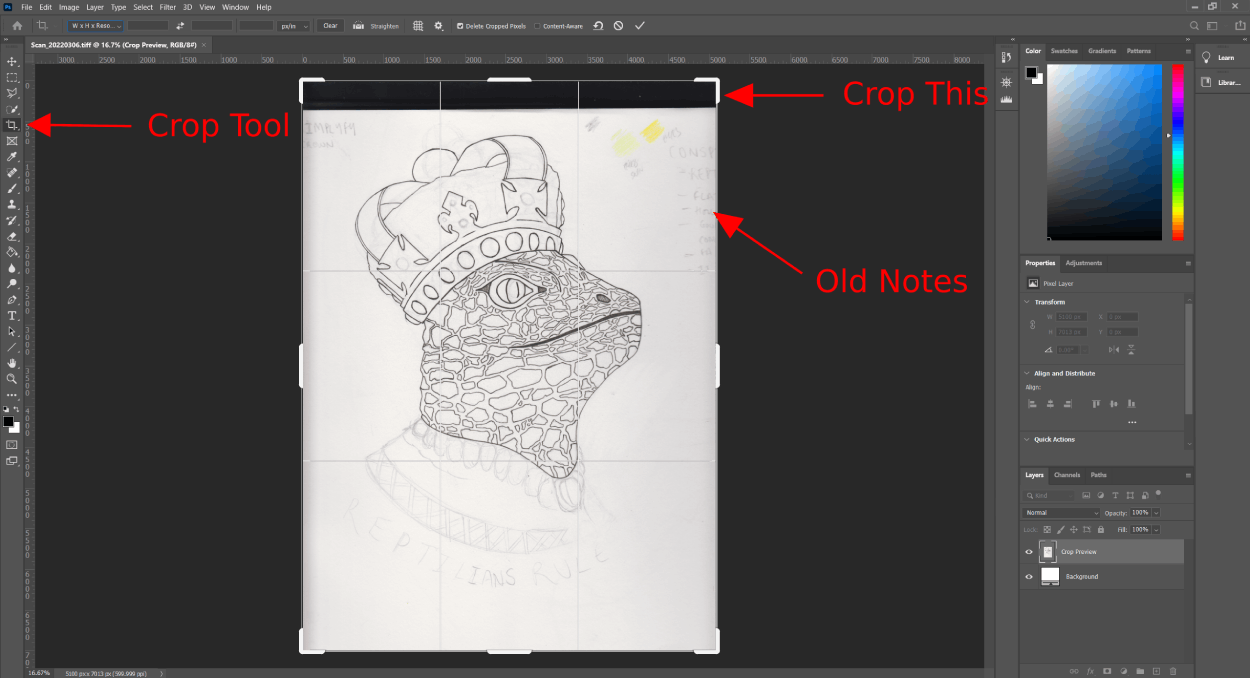
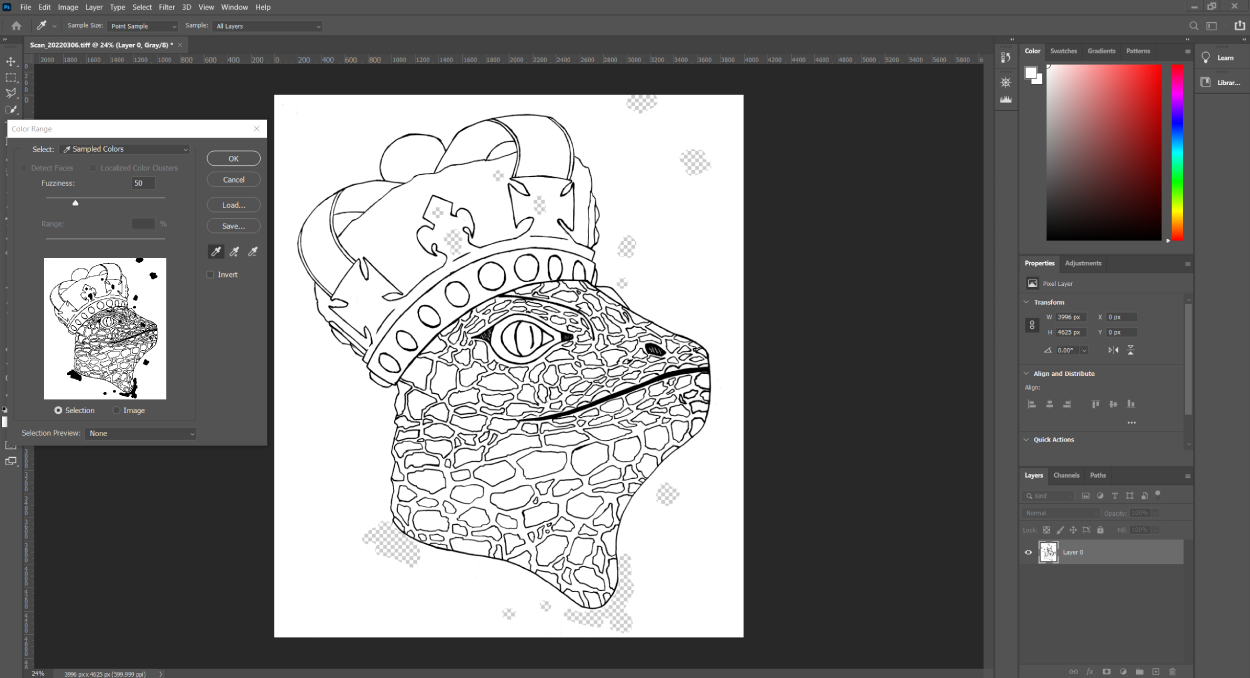
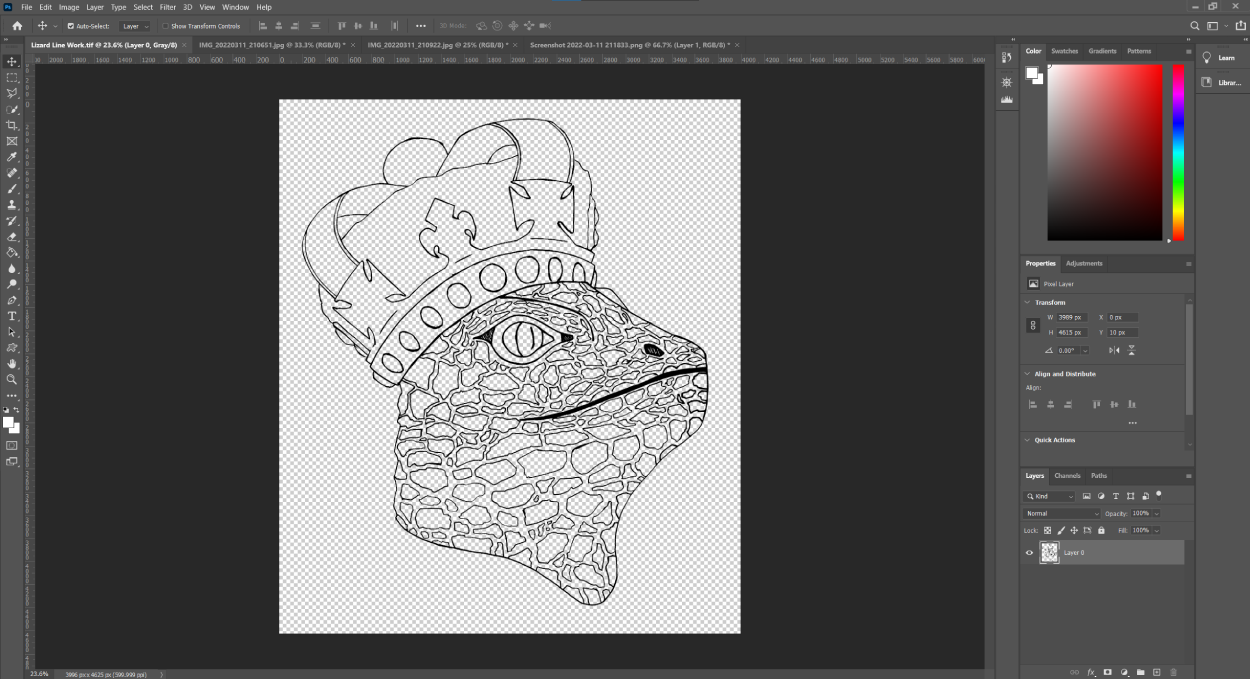
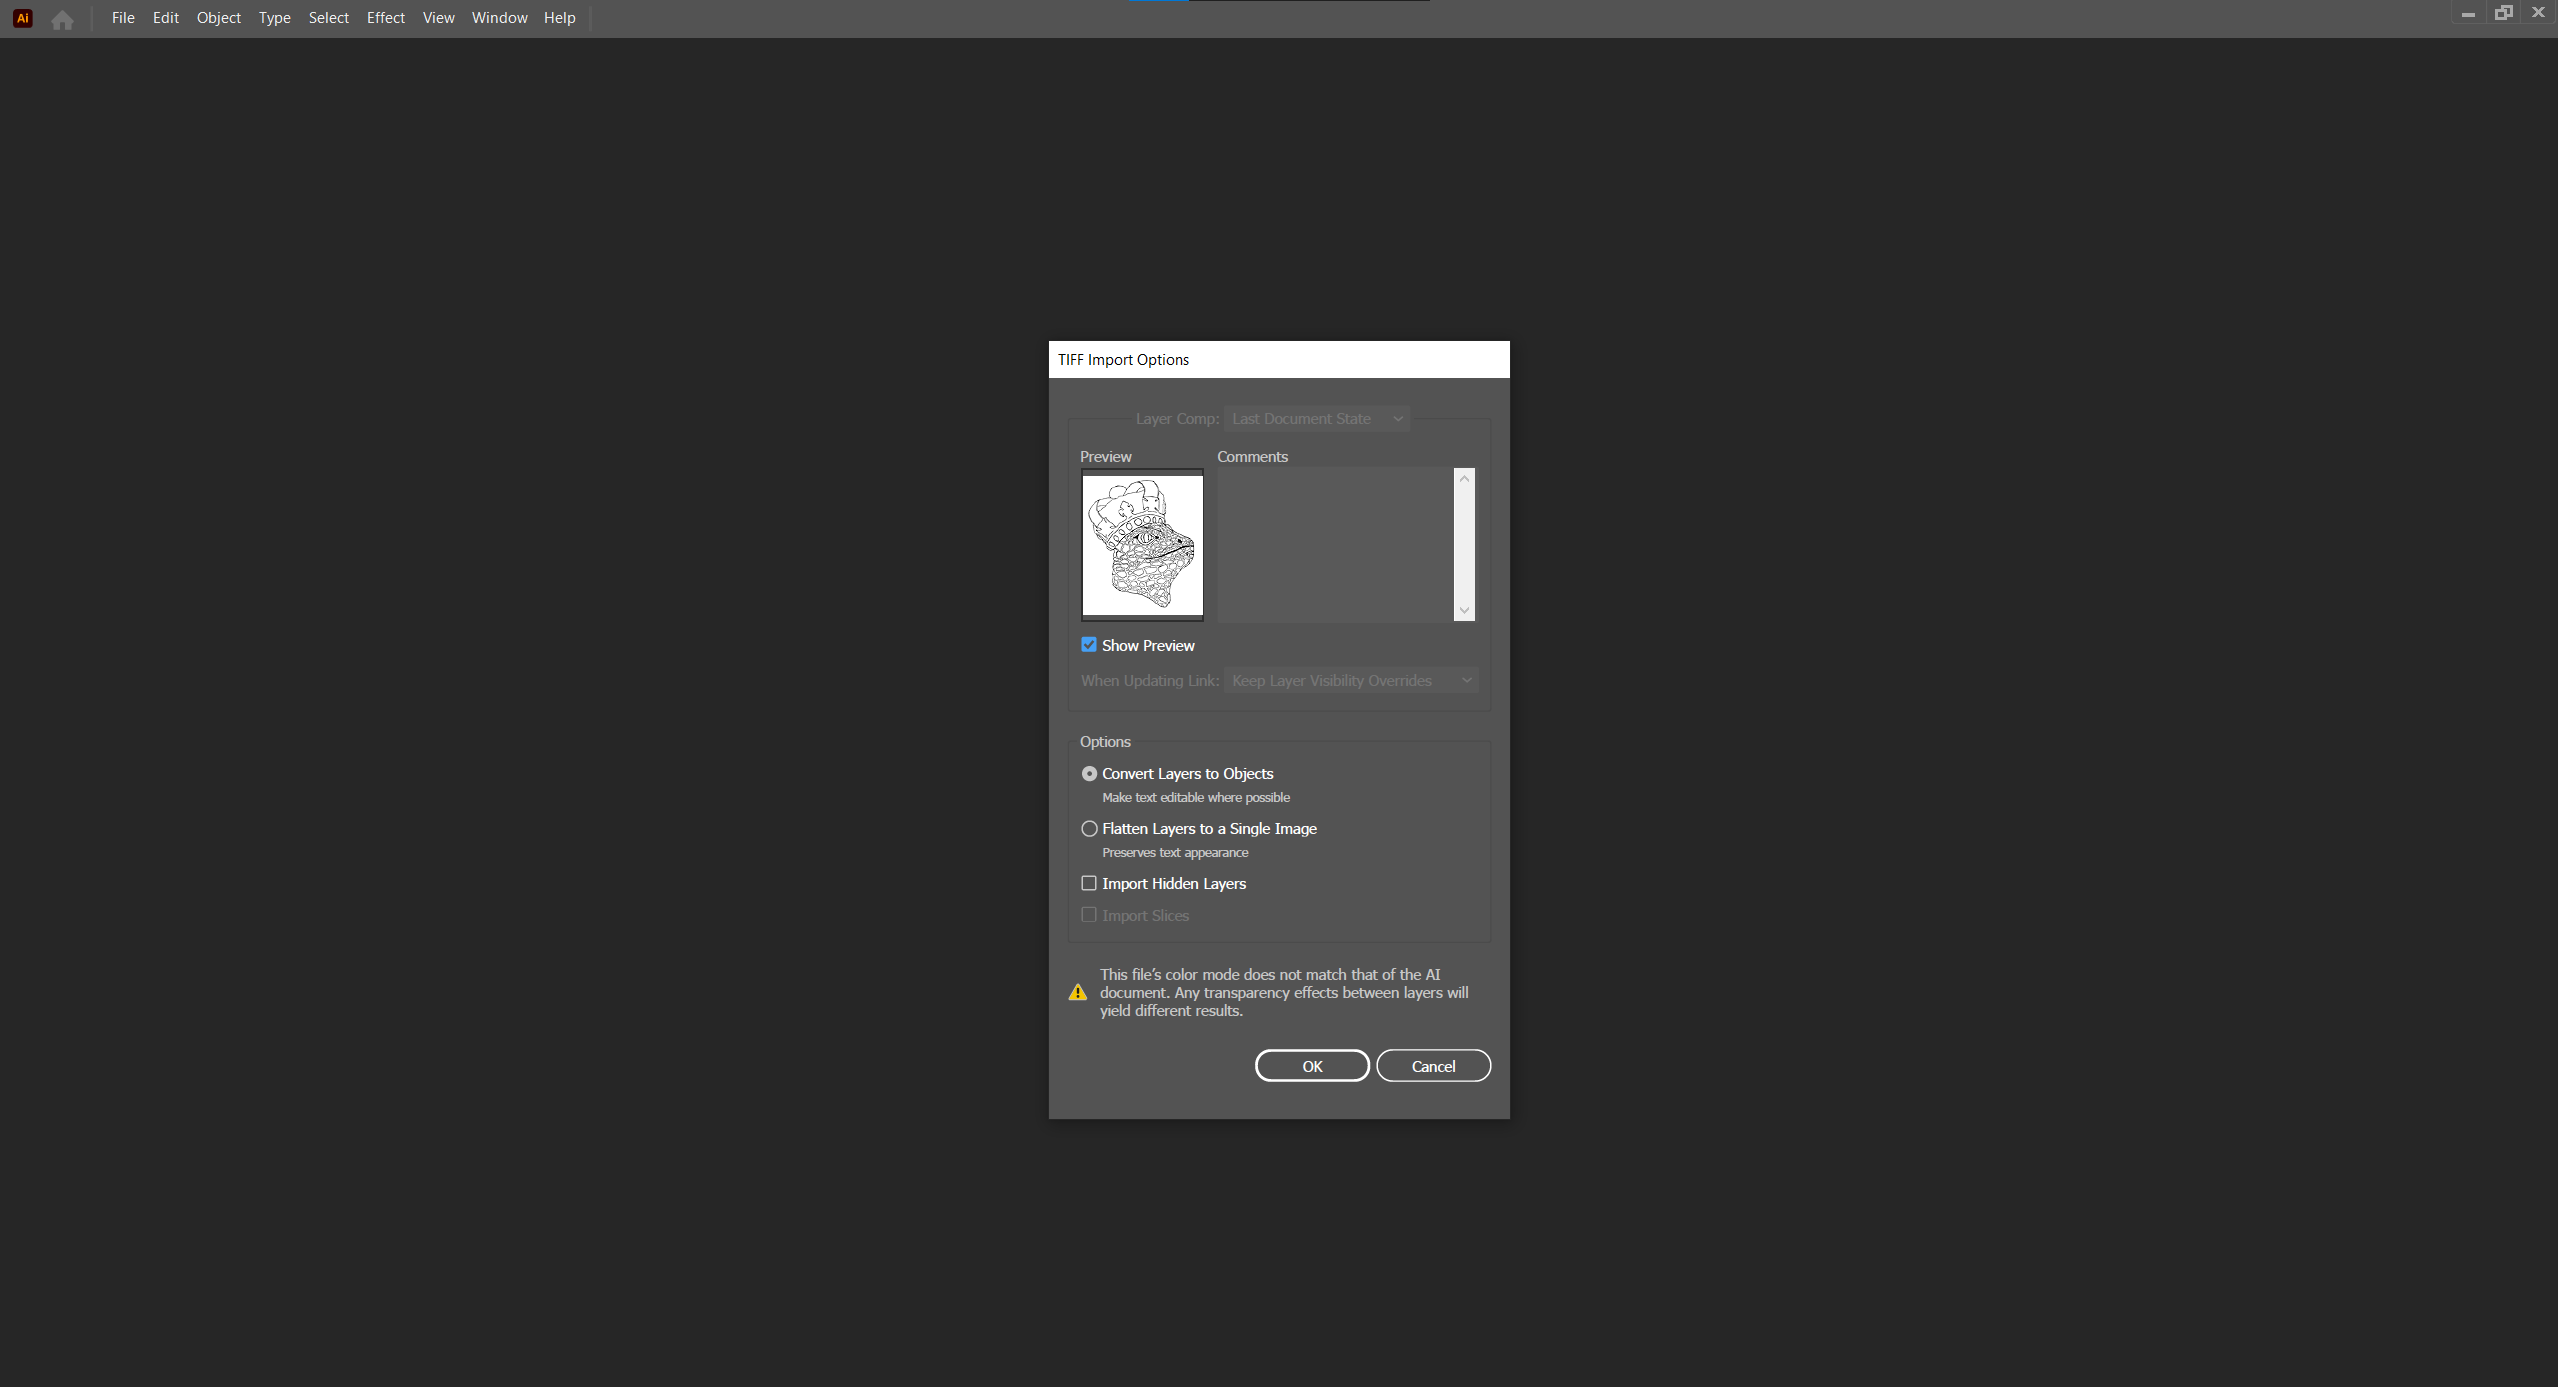
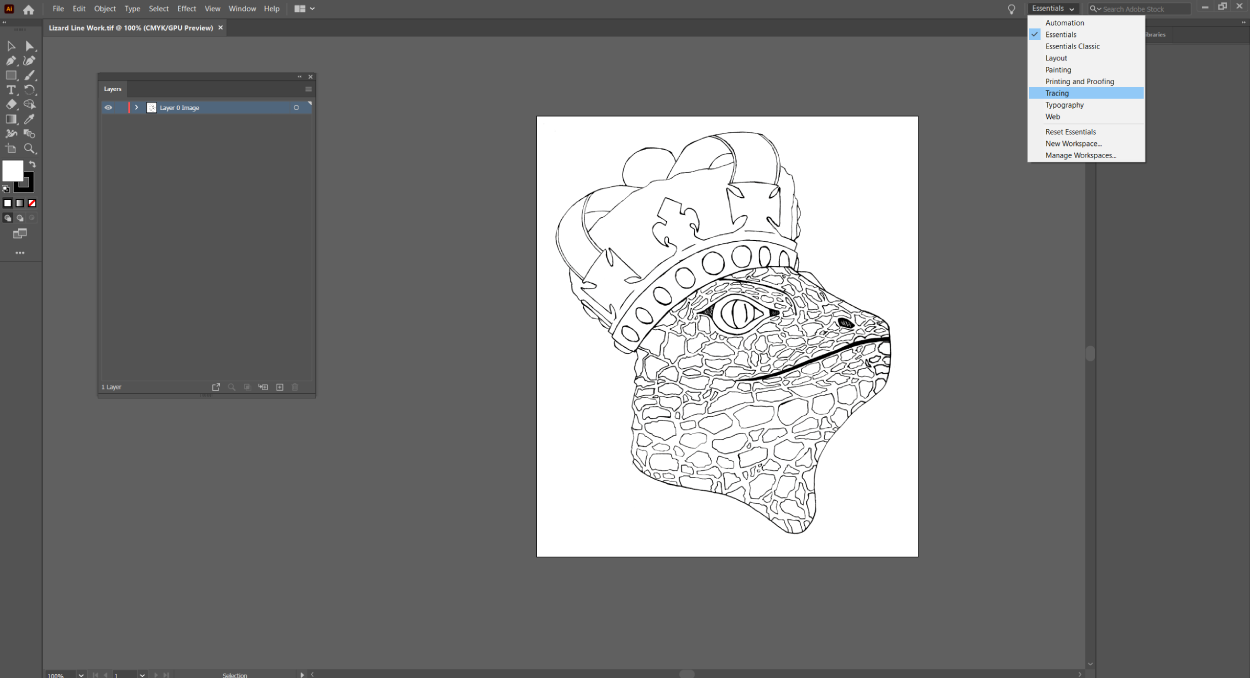
Are you looking to create digital artworks from your sketches or drawings? Or turn photo into line drawing on illustrator? It can be a complex process, however this step by step guide on how to scan a drawing and turn it into a digital design using photoshop and illustrator should help keep it simple.

You will start out with your sketch on paper and end up with a vector illustration that can be scaled to any size and used to print on a variety of mediums. There are many guides online, each person has their own way of creating vector art from drawings, this guide was the method used to create the artworks in my portfolio.

Affiliate Disclosure:Β I only recommend products I would use myself and all opinions expressed here are our own. This post may contain affiliate links that at no additional cost to you, I may earn a small commission when you purchase. These commissions help with the running costs of this website, if you do purchase via one of the product links many thanks it is greatly appreciated!

What’s Needed to Digitise a Drawing or Sketch into a Vector?

Check out our guide to free editing software that can be used in this guide.

Luke Hickman

Author at Hickman Design

Luke Hickman is a printmaker and artist with over 15 years of experience. He studied at Norwich University, graduating with a BA (Hons) Fine Art, and has worked in both the commercial printing and digital marketing industries for over 7 years. Luke’s work revolves around the idea of creating art that can illustrate a story with topics covering war, politics and history.

Read Full Bio

The Process for Turning Drawings into Graphics Step by Step

Step 1 – Sketch Your Design

First start out sketching your design with a pencil such as a 2H, don’t use any B pencils as you only want to leave a faint line. If you use a B pencil it will leave dark lines which can make scanning your sketch harder to tidy up later on in the process.

Once you have sketched out your design and you’re happy with it, use a black drawing pen such as a Faber Castell Pitt Calligraphy Pen S / XS to outline your design. You want to try and create a contrast between white and black to make it easier when scanning your design.

Personally I would not do any shading or colouring at this point, make sure you are only creating a simple line drawing, keep it simple.

Sketch that has been redrawn with fine drawing pens.

Step 2 – Scan Your Design / Sketch into Computer

Once you have finished your illustration / sketch and traced it with a black pen you should be ready to scan your design into a computer. Make sure to set up so that you have 600 DPI and to save as TIFF file format to ensure a high quality scan is saved, it’s better to get a high res copy in case you need to scale the artwork. Please see the screenshot below for the settings on the Windows 10 scanner app.

Windows 10 scanning app settings.

Sketchbook being scanned.

Step 3 – Edit Illustration in Adobe Photoshop

Now that you have scanned your drawing into your PC, find it and open it in Adobe Photoshop. Please follow the steps below on what to edit and where to find the options / setting for each step.

Crop the areas of the scan that are not needed, such as black edges, writing / notes etc. Crop close to the edge of your design leaving a small border around the edge, about 3 – 5cm. To use the crop tool you can press C on the keyboard or look for the crop tool on the left hand toolbar.

Areas to crop from scan, find the cropping tool on the left.

Set the document to black and white mode (Grayscale) as we do not need any colour at this point, this will help with the next step. This can be done by going to Image > Mode > Grayscale > Click discard on the window that pops up.

Setting the document to grayscale.

Now we need to adjust the levels of light and dark in the document, we want to create a high contrast between the black lines and white background. This can be done by going to Image > Adjustments > Levels. You can start experimenting by moving the high tone marker to the left and see what the results are, in our example the white background gets brighter and fades out the pencil faint lines which is what we want to do.

You can then try moving the low tone marker to the right to darken the black lines, the mid tones can be a bit tricky to work out so try tweaking the middle marker left or right and see what the results are. If you are having issues with some pencil marks you can use the eraser tool by pressing E on the keyboard and erasing the pencil marks, make sure to unlock the layer when erasing by pressing the padlock icon. You can make the eraser larger and smaller by right clicking the background and setting the desired size.

Levels in Photoshop.

High level moved to left, pencil lines faded.

All levels tweaked to remove most of the pencil lines.

Unlock layer to edit such as erasing.

Eraser tool on the left to remove pencil marks.

Now we have removed the worst of the pencil marks and the dark and light tones are left, we now need to remove the white background. Go to Select > Color Range and now a new window has opened with a preview of the current document. When you hover over the document an eyedropper tool appears as your mouse icon, this selects the colour/range that will be selected by the tool.

You want to select the white background, this will be highlighted white in the document, you can increase the Fuzziness slide to 50 to make sure you select any lighter tones you did not erase (If you go too high it will select the black layer which we don’t want to do) Now click ok. You now have the white layer selected, now click delete or backspace to remove the white then CTRL + D to deselect the layer (CMD + D for Mac users).

Finding select color range tool.

Using eyedropper tool to select color range to delete.

Line work after deleting selected colour range.

You now have your sketch line work ready to be exported into illustrator, save the document as a TIFF file to ensure it is high resolution and no compression. Go to File > Save As TIFF > Name Doc > Image Compression: None > Click OK

Step 4 – Convert Drawing / Illustration into Vector

We are now on the final step to making your drawing that you have scanned into a vector.

Open your saved file in Adobe Illustrator, on the pop up click Convert Layers to Objects > Click Ok. Now you have your document open in Illustrator and ready for the next step.

Opening your drawing in Adobe Illustrator.

Set your workspace to Essentials Classic by clicking the drop down in the top right of the screen, see image below. This gives you access to all of the needed tools / settings.

Setting up your workspace in Adobe Illustrator.

Select the layer that contains your image by clicking the circle next to the layer name.

Selecting your layer in Illustrator.

Now once the layer is selected we can turn it into a vector by going to Object > Image Trace > Make and Expand > Click Ok.

Make and expand will create a vector version of your drawing.

Vector anchor points.

Make sure to set Illustrator to colour mode go to Window > Color (Make sure is ticked) > RGB (Monitors) or CMYK (Print).

Make artwork use a colour mode rather than grayscale.

Final design Reptilians Rule.

You now have your illustration converted into vector artwork which can be coloured and scaled to any size needed. You can edit the fine details of the vector, we recommend you do this.

Hopefully this guide has been useful to help you understand how to create vector art with hand drawn sketches, please share to anyone you know and check out our other guides.

Other great guides and references for turning drawings into graphics

Displaying Your Artwork

After converting your sketches into vector art, consider unique ways to showcase them. Websites like Wallpics offer creative solutions, such as customisable photo tiles, which can be a great option for displaying your digital art in your home or office. Explore these options to give your vector artwork the visibility it deserves.

Comments & Notes

Close Menu
Contents