Sharp lino cutting tools make the difference between smooth, precise cuts and frustrating, ragged lines that can ruin your artwork. When tools become dull, you need to apply more pressure to cut through linoleum, which can lead to slips, accidents, and damaged blocks.
Maintaining sharp edges on your tools improves performance, increases safety, and saves money. Sharp tools glide through material with minimal force, while dull tools can slip unexpectedly. Regular maintenance helps you avoid expensive sharpening services or early tool replacement.
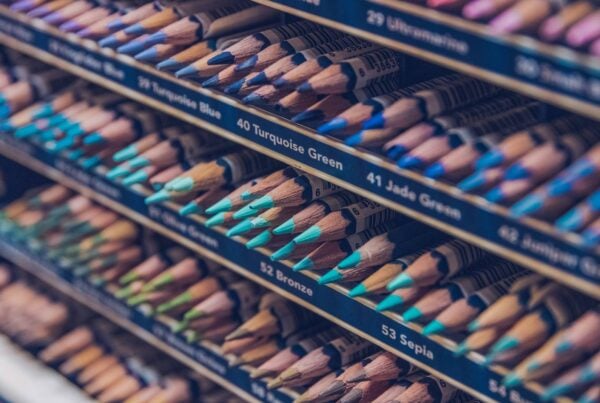
Sharpening linocut tools takes practice but becomes second nature once you master the basics. V-gouges, U-gouges, and lino knives each have specific sharpening needs. Understanding these requirements helps you maintain a professional toolkit.
Key Takeaways
- Sharp tools are safer, more efficient, and produce cleaner cuts than dull ones.
- Different sharpening methods work best for different tool types and conditions.
- Regular maintenance extends tool lifespan and prevents major sharpening issues.
Table of Contents
Essential Tools for Sharpening and Maintenance
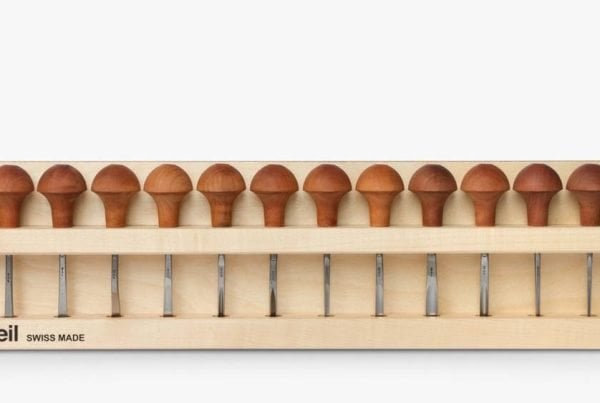
You need three main categories of equipment for sharpening: primary whetstones for initial sharpening, specialised slip stones for curved profiles, and stropping equipment for final polishing. Each tool has a specific role in maintaining sharp cutting edges.
Primary Sharpening Stones and Whetstones
Water stones form the foundation of any lino tool sharpening system. Use whetstones with dual grit values: one coarse side around 700 grit and one fine side between 3000-6000 grit.
The coarse side removes material quickly to restore damaged edges. The fine side creates the final polish for smooth cutting.
Essential Features to Look For:
- Dual-sided design for versatility
- Soaking ability for water stones
- Stable base to prevent slipping
- Appropriate size for your tools
Soak most whetstones in water for 10-15 minutes before use. This prevents the stone from absorbing oil from the blade and ensures proper cutting action.
Quality sharpening stones last for years with proper care. Store them in a dry location and clean them regularly with a flattening stone to maintain their cutting surface.
Specialised Slip Stones for Profiles
Slip stones have curved and pointed edges designed specifically for V-gouges and U-gouges. These stones remove the metal burr that forms during primary sharpening on flat whetstones.
The curved edge matches the inside radius of U-shaped tools. The pointed edge fits into V-shaped profiles for precise sharpening.
Key Slip Stone Features:
- Multiple radius curves (typically 13mm to 3mm)
- Tapered edges at 40-degree angles
- Fine grit around 4000 for finishing
- Compact size for detailed work
Professional slip stones help achieve zero radius edges on curved tools. This allows for clean cuts without tearing the linoleum surface.
Use slip stones after primary sharpening to refine the inside edges of your gouges. Work slowly and keep a consistent angle for best results.
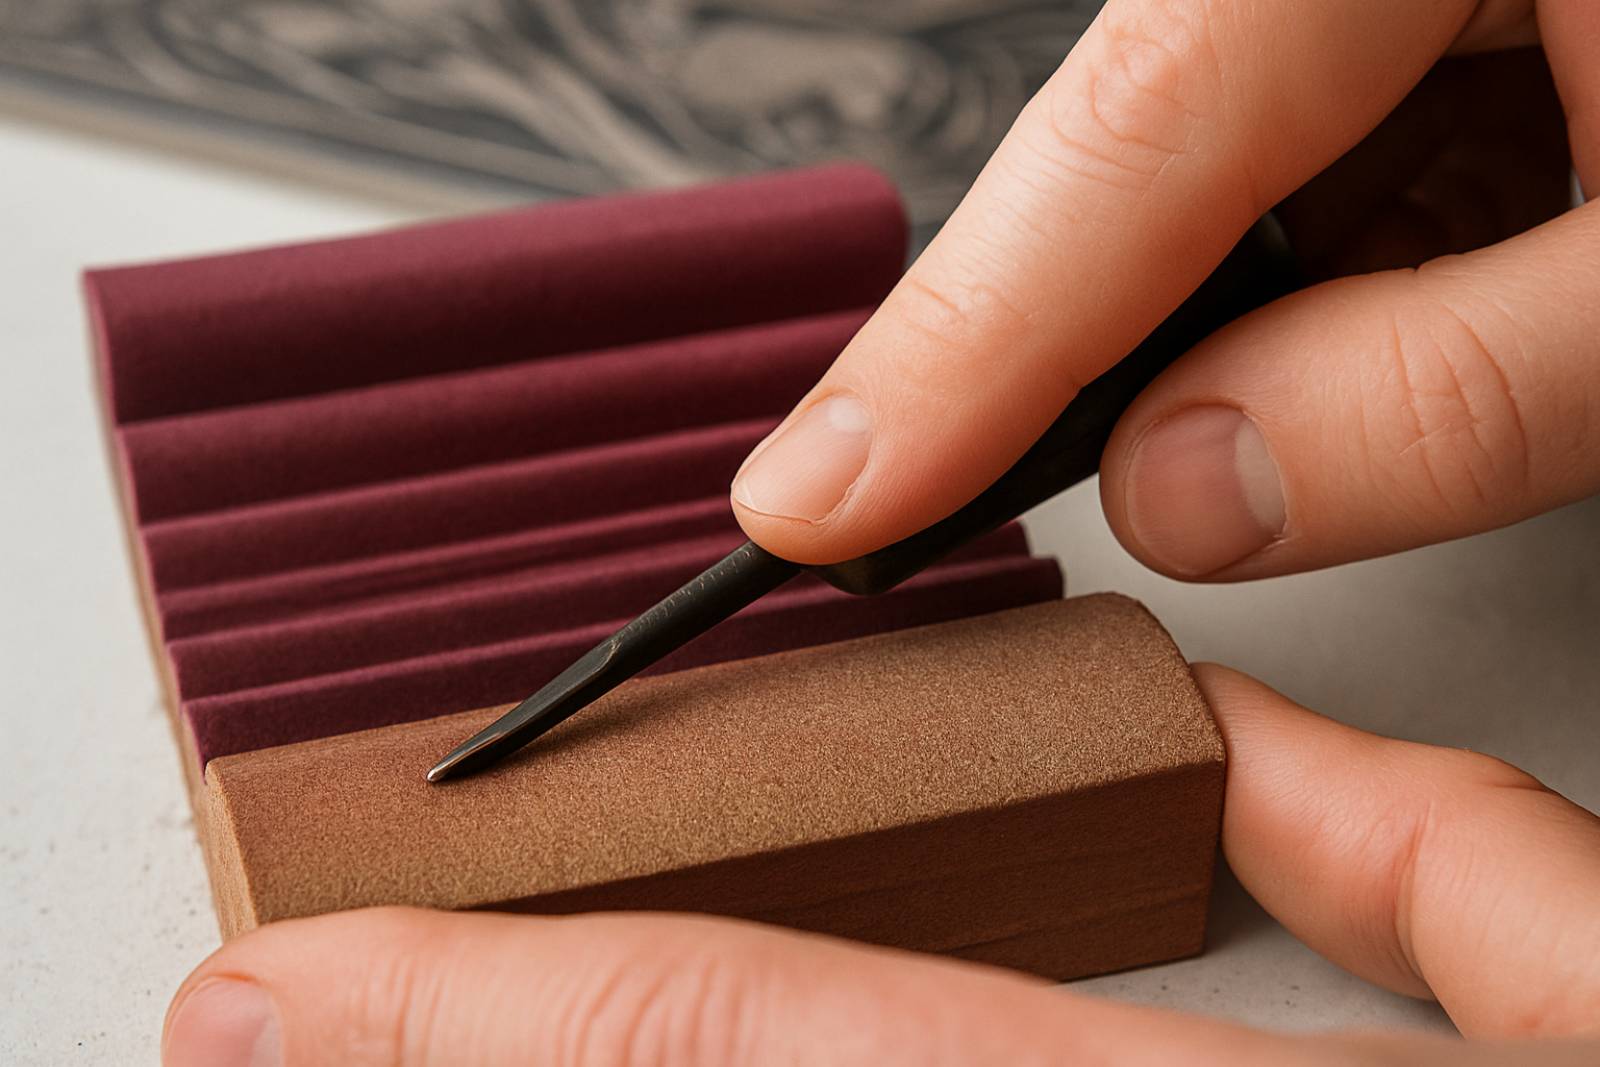
Stropping Equipment and Compounds
Stropping equipment provides the final step in achieving razor-sharp edges. Leather strops and wooden profiles polish away microscopic scratches left by sharpening stones.
A proper strop consists of unpolished leather for coarse work and shaped softwood profiles for U and V gouges. The leather removes fine scratches, while the wooden profiles match your tool shapes.
Stropping Setup Components:
- Unpolished leather strips
- Wooden U and V profiles
- Stropping compound (chromium oxide)
- Stable mounting system
Stropping maintains sharp edges between major sharpenings. Pull the blade backwards along the strop with firm pressure, keeping the original bevel angle.
Apply stropping compound sparingly to the leather surface. Too much compound creates a messy work area without improving results.
Regular stropping during projects keeps your tools sharp throughout long carving sessions.
Preparing Your Lino Cutting Tools for Sharpening
Proper preparation means cleaning your lino tools and inspecting each cutting edge for damage, then securing the tool safely before sharpening.
Cleaning and Inspecting Cutting Edges
Remove all debris from your lino tools before sharpening. Dried linoleum, wood particles, and oil residue can interfere with sharpening and damage your stones.
Use a soft cloth with warm soapy water to clean the blade and handle. For stubborn residue, use white spirit or turpentine.
Dry the tools completely before proceeding to avoid rust.
Next, examine each cutting edge under good lighting. Look for chips, nicks, or rolled edges that may need special treatment.
| Damage Type | Identification | Treatment Required |
|---|---|---|
| Minor nicks | Small notches in edge | Standard sharpening |
| Deep chips | Large missing sections | Coarse grit first |
| Rolled edge | Curved-over metal | Whetstone sharpening |
Check V-gouges and U-gouges for uneven wear. These tools often develop flat spots that affect performance.
Securing the Tool for Safe Sharpening
Stable positioning helps you maintain consistent angles while sharpening. Blunt gouges are more dangerous than sharp ones because they require extra pressure.
For handheld sharpening, grip the tool firmly with your dominant hand. Keep your fingers away from the cutting edge.
Never sharpen towards your body. Always move the blade away from yourself and others.
When using whetstones, place a damp towel beneath the stone to prevent sliding. This creates a secure base for controlled movements.
For V-tools and U-gouges, you often need to rotate the tool during sharpening. Practice the motion without the stone first to ensure smooth, controlled movements.
Maintain the original bevel angle of each lino tool. Most cutting tools have bevels between 20-30 degrees from the manufacturer.
Sharpening Techniques for Different Lino Tool Types
Each lino cutting tool requires specific sharpening methods to maintain its cutting edge. Different sharpening tools work better for various gouge shapes and blade angles.
Sharpening with Whetstones and Water Stones
Water stones restore dull lino cutting blades. Select whetstones with proper grit values for effective sharpening.
Choosing the Right Grit:
- Coarse side: 700 grit minimum
- Fine side: 3000-6000 grit
- Extra coarse stones for very blunt tools
Start with the coarse side to reshape the cutting edge. The rough surface removes metal quickly and sets the angle.
Switch to the finer grit to refine the edge and remove scratches left by the coarse stone.
Technique Steps:
- Soak the whetstone in water for 10-15 minutes.
- Hold the tool at the original bevel angle.
- Move the blade across the stone in smooth strokes.
- Maintain consistent pressure throughout.
Work systematically from coarse to fine grits for a sharp, polished edge that cuts cleanly through linoleum.
Using Slip Stones on V and U Gouges
Slip stones have curved and pointed edges for shaped tools. These stones remove burrs that form after whetstone sharpening.
V-shaped gouges need special attention on their angled surfaces. Use the pointed edge of the slip stone to reach into the V groove.
The curved edge works for U-shaped gouges. Follow the tool’s natural curve to keep its profile.
For V-Gouges:
- Use the tapered 40-degree edge.
- Work each side equally.
- Maintain the original angle.
For U-Gouges:
- Follow the curved radius.
- Work from centre outwards.
- Check for consistent sharpness.
Slip stones give tools a zero radius edge. This precision allows for accurate cutting and detailed work in your linoleum blocks.
Hold the slip stone steady and move the tool against it. Use light pressure to avoid overcutting but ensure contact with the blade.
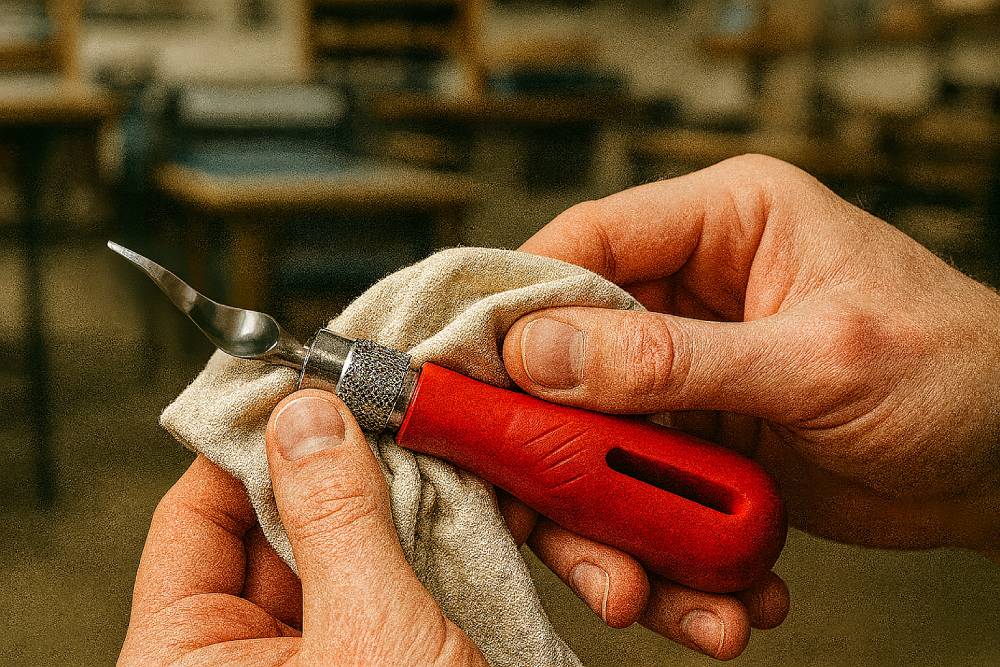
Stropping to Achieve a Fine Cutting Edge
Stropping equipment polishes sharpened tools. Strops maintain sharp edges between major sharpening sessions.
Most strops combine unpolished leather with shaped softwood profiles. The leather acts as a coarse surface for initial stropping.
Hold the cutting edge against the strop and slide it backwards. This motion removes microscopic scratches and unevenness.
Stropping Process:
- Position the cutting edge facing the strop.
- Slide backwards with firm pressure.
- Repeat 10-15 times per side.
- Alternate sides for V-shaped tools.
Key Benefits:
- Maintains sharpness between projects.
- Removes microscopic imperfections.
- Extends time between major sharpening.
For V-shaped tools, alternate between sides equally. Ten strokes on one side require ten on the other for balanced sharpening.
U-shaped tools need careful attention to their curved edges. Adjust your angle to contact all points of the cutting edge.
Regular stropping keeps your tools sharp throughout long carving sessions.
Maintenance and Regular Care for Longevity
Regular maintenance keeps lino cutting tools performing at their peak for years. Daily stropping, proper storage, and routine honing prevent costly replacements and ensure clean, precise cuts.
Proper Stropping and Polishing
Stropping equipment keeps edges razor-sharp between major sharpening sessions. Strop after every 15-20 minutes of carving to remove microscopic metal particles that dull the cutting edge.
Quality strops use leather mounted on wood, often shaped to match V and U tool profiles. Dress the leather surface with stropping compound—a fine abrasive paste that polishes and sharpens.
Stropping technique:
- Hold the tool at the original bevel angle
- Draw the blade backwards across the strop
- Apply light, consistent pressure
- Complete 8-10 strokes per side for V-tools
For U-gouges, gently rock the tool to contact the entire curved edge. Always pull the blade backwards during stropping to avoid damaging both the strop and cutting edge.
Polish regularly with fine compounds to remove scratches from sharpening. This creates smoother cuts and reduces drag through linoleum.
Routine Honing to Prevent Dullness
Daily honing keeps lino tools from becoming dull. Use fine ceramic or steel honing rods between projects to realign the blade edges.
Honing schedule:
- Light honing: Every 30 minutes of carving
- Medium honing: After each carving session
- Deep honing: Weekly for regular users
Ceramic hones work best for V-tools and small gouges. Use steel hones for larger U-gouges and chisels.
Hone with gentle pressure, maintaining the original bevel angle, and draw the blade across the hone 3-5 times per side.
Watch for signs of dullness: increased cutting resistance, rough line quality, or linoleum tearing. Hone or sharpen tools immediately when these appear.
Storage and Handling Best Practices
Proper storage prevents edge damage and extends tool life. Do not store tools loose in drawers where blades can touch each other or hard surfaces.
Ideal storage solutions:
- Individual blade guards or sheaths
- Tool rolls with fabric pockets
- Magnetic strips mounted safely
- Dedicated tool chests with foam inserts
Control temperature and humidity to prevent rust. Store tools in dry environments below 70% relative humidity. Use silica gel packets in tool boxes to absorb moisture.
Handle tools carefully. Place them on soft surfaces when not cutting. Avoid placing them on concrete or metal workbenches, as sharp impacts can chip or crack edges.
Clean tools regularly to remove linoleum residue and prevent corrosion. Wipe blades with light oil after each session, then store them in protective cases.
Troubleshooting Common Sharpening Issues
Burrs form during sharpening and create rough, uneven cutting surfaces that reduce precision. Assess damaged tools carefully to decide if restoration is possible or if replacement is necessary.
Dealing with Burrs and Irregular Edges
Burrs develop when metal particles accumulate along the cutting edge during sharpening. These fragments make tools feel sharp but actually cause ragged cuts.
Use a slip stone to remove burrs from V-shaped and U-shaped gouges. The curved edge of a slip stone matches the tool’s profile.
Strop after every sharpening session to eliminate remaining burrs. Draw the cutting edge backwards across leather or fine abrasive material with light pressure, keeping the original bevel angle.
Common burr indicators:
- Rough cutting sensation
- Tearing instead of clean cuts
- Visible metal particles on the edge
- Scratchy feel when running a fingernail across the edge
For irregular edges, check the cutting edge under good lighting to find high spots. Use progressively finer grits to smooth uneven areas, starting with 1000-grit stones and finishing with 4000-6000 grit.
Restoring Damaged or Chipped Tools
Address small chips and nicks immediately to prevent further damage. Assess the severity before choosing a restoration method.
Minor chips respond well to careful grinding with coarse whetstones. Begin with 400-700 grit stones to remove damaged material and work slowly to avoid overheating the metal.
Damage assessment criteria:
- Minor: Small nicks less than 1mm deep
- Moderate: Chips affecting 2-3mm of edge length
- Severe: Deep gouges or bent cutting edges
Reshape severely damaged tools using grinding wheels, but this requires skill. Professional sharpening and tool regrinding services provide safer options for valuable tools.
Bent cutting edges often result from dropping tools or using too much pressure. Gently straighten minor bends with pliers wrapped in cloth. Replace tools with severe structural damage to avoid injury.
Frequently Asked Questions
Proper tool maintenance uses techniques like progressive sandpaper, reliable professional services, and specialised equipment like slipstrop kits. Home sharpening and maintenance routines can greatly extend tool life.
What steps are involved in sharpening linocut tools using sandpaper?
Start with coarse-grit sandpaper, typically 220-400 grit, to reshape dull edges. Hold the tool at the original bevel angle and move it in smooth, consistent strokes.
Progress to medium grit sandpaper around 800-1000 grit to remove scratches and refine the edge.
Finish with fine-grit sandpaper, 2000-3000 grit, for the final polish. This creates a smooth, sharp cutting edge.
Clean the tool thoroughly between each grit change to prevent metal filings from scratching the blade.
Where can I find a professional service for sharpening lino tools?
Professional sharpening services like Shade Tree Sharpening in Windsor and Ashley Iles Tool Restoration offer specialised regrinding. These companies understand the specific angles needed for printmaking tools.
Contact local art supply shops first. They often know trusted sharpening services in your area.
Woodworking shops sometimes sharpen carving tools, but confirm they understand printmaking gouges.
Online services are available but require shipping tools, which means longer turnaround times and potential shipping risks.
Can you guide me through the process of sharpening lino tools at home?
Select a whetstone with at least 700 grit on one side and 3000-6000 grit on the other. Water stones provide consistent results.
Work on the coarse side first to address chips or dullness. Hold the tool at the original bevel angle.
Switch to the fine grit side to refine the edge and remove scratches.
Slip stones with curved edges help remove burr from V-shaped and U-shaped tools.
Finish by stropping on leather to achieve a sharp edge and remove microscopic imperfections.
What is a slipstrop sharpening kit and how is it used for linocut tools?
A slipstrop combines leather stropping surfaces with shaped profiles for different tool types. The Flexcut Slipstrop Carving Tool includes both flat and profiled surfaces for various gouge shapes.
Use the shaped profiles to match your tools. V-gouges need V-shaped strops, and U-gouges require curved surfaces.
Pull the tool backwards along the leather surface with firm pressure, maintaining the proper angle.
For V-tools, alternate between sides equally.
What techniques are recommended for maintaining the sharpness of block printing tools?
Strop regularly between carving sessions to keep tools sharp. Strop during projects to maintain cutting efficiency instead of waiting until tools are dull.
Store tools with edge guards or in protective rolls to avoid nicks and chips.
Clean tools after each session to prevent ink and debris build-up.
Avoid cutting through to hard surfaces underneath the lino to prevent edge damage and unnecessary wear.
Are there any specialised sharpening tools available for Powergrip lino tools?
Standard whetstones and slip stones work effectively with Powergrip tools. The steel composition responds well to traditional sharpening methods.
We can use the same stropping equipment for Powergrip tools as other brands. The blade profiles match standard sharpening accessories.
Diamond sharpening plates offer another option for these tools. They cut quickly and work well for touch-up sharpening between major sessions.