Lino Printing for Beginners: A How-To Guide

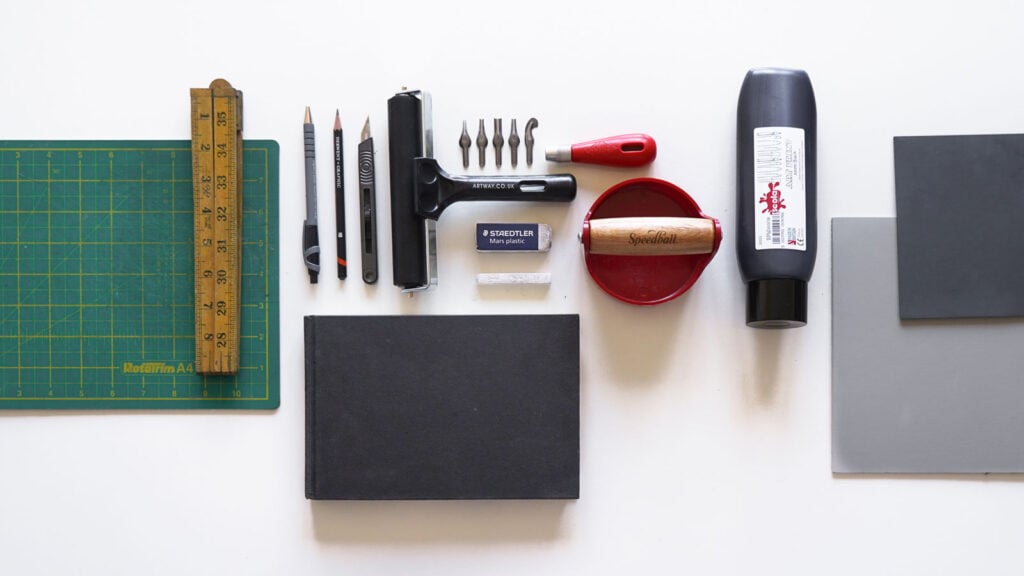
With over 12 years of lino printing experience, I’ve created this beginner-friendly guide to take you step-by-step through the entire process. We’ll cover everything from selecting the right tools and setting up a safe and efficient workspace, to carving, inking, troubleshooting, and finally pulling your first crisp lino print. My goal is to help you avoid the common pitfalls and empower you to transform plain linoleum blocks into striking works of art, right from your home.

What Exactly is Lino Printing?

Lino printing, also known as linocut, is a traditional relief printmaking technique. In relief printing, an artist carves an image into a block of material—in this case, linoleum. Ink is then applied to the remaining raised surface with a roller (brayer), and the image is transferred to paper or fabric by applying pressure. This process allows you to create multiple copies of the same artwork, known as an edition.

Think of it like a rubber stamp; the parts you don’t carve away are the parts that will print.

Lino printing is a popular form of relief printmaking, similar to woodblock printing. However, linoleum is generally softer and easier to carve than wood, making it a preferred material for beginners and many professional artists alike.

While this guide focuses on the single-color linocut technique (which we’ll achieve using a simple baren or wooden spoon, not an expensive press), the world of lino printing is vast. More advanced techniques include reduction printing (using one block for multiple colors) and multi-block printing (using a separate block for each color).

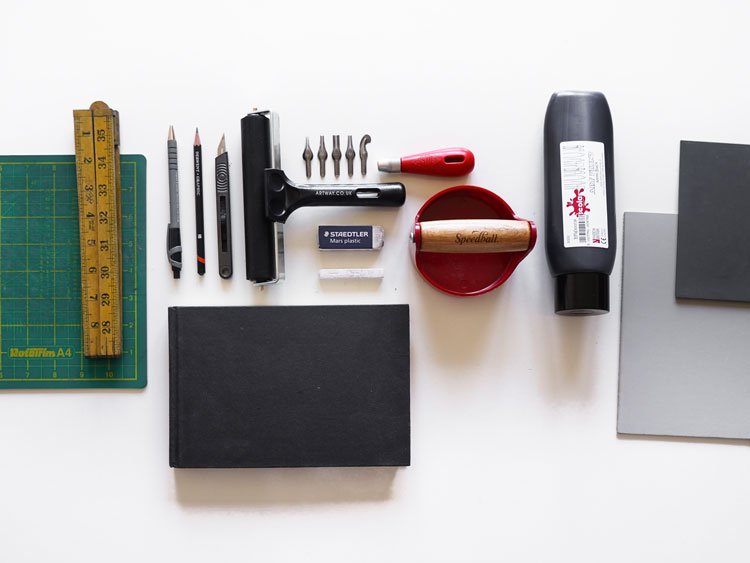
The Lino Printing Process: A Complete Overview

Before we dive into the step-by-step instructions, here’s a quick look at the entire journey, from initial idea to finished print:

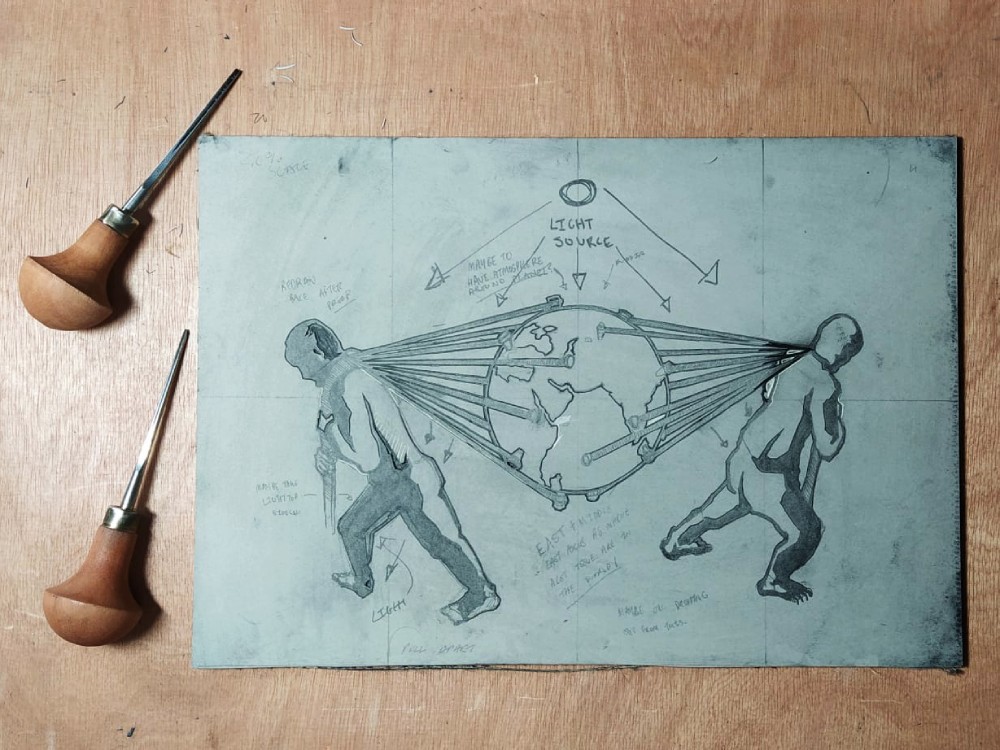
  1. Designing Your Lino Print: Brainstorming and sketching your initial idea.
  2. Transferring Your Design: Getting your drawing onto the lino block.
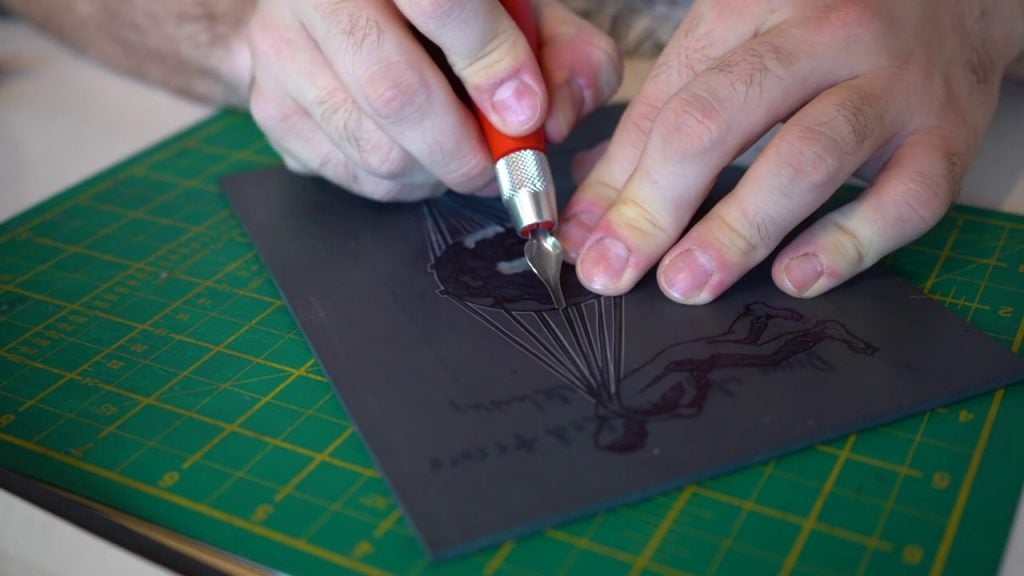
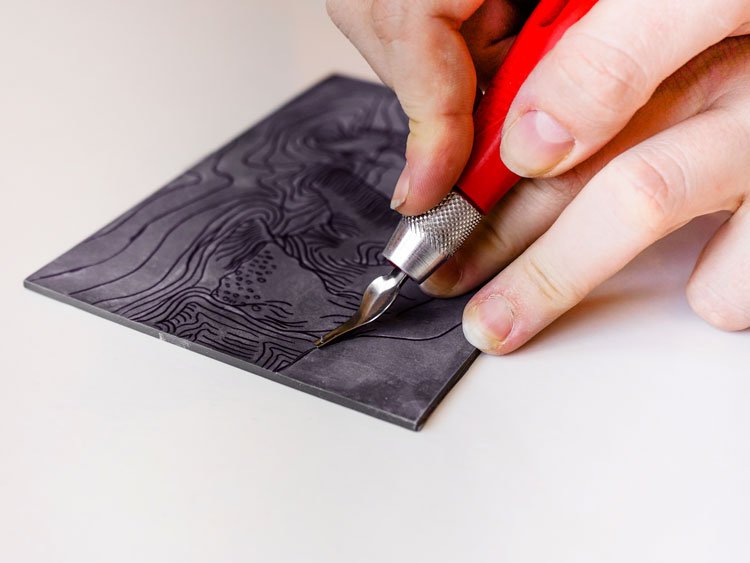
  3. Carving the Lino: The satisfying process of cutting away the negative space.
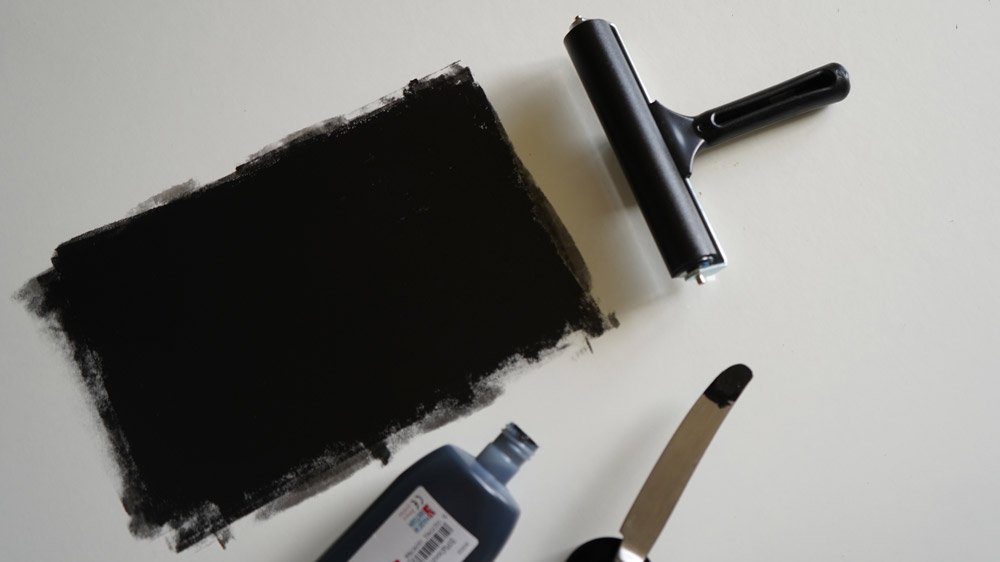
  4. Inking the Block: Rolling a perfect, even layer of ink.
  5. Printing Your Linocut: Pulling the print to reveal your artwork.
  6. Clean Up & Drying: The essential final steps.

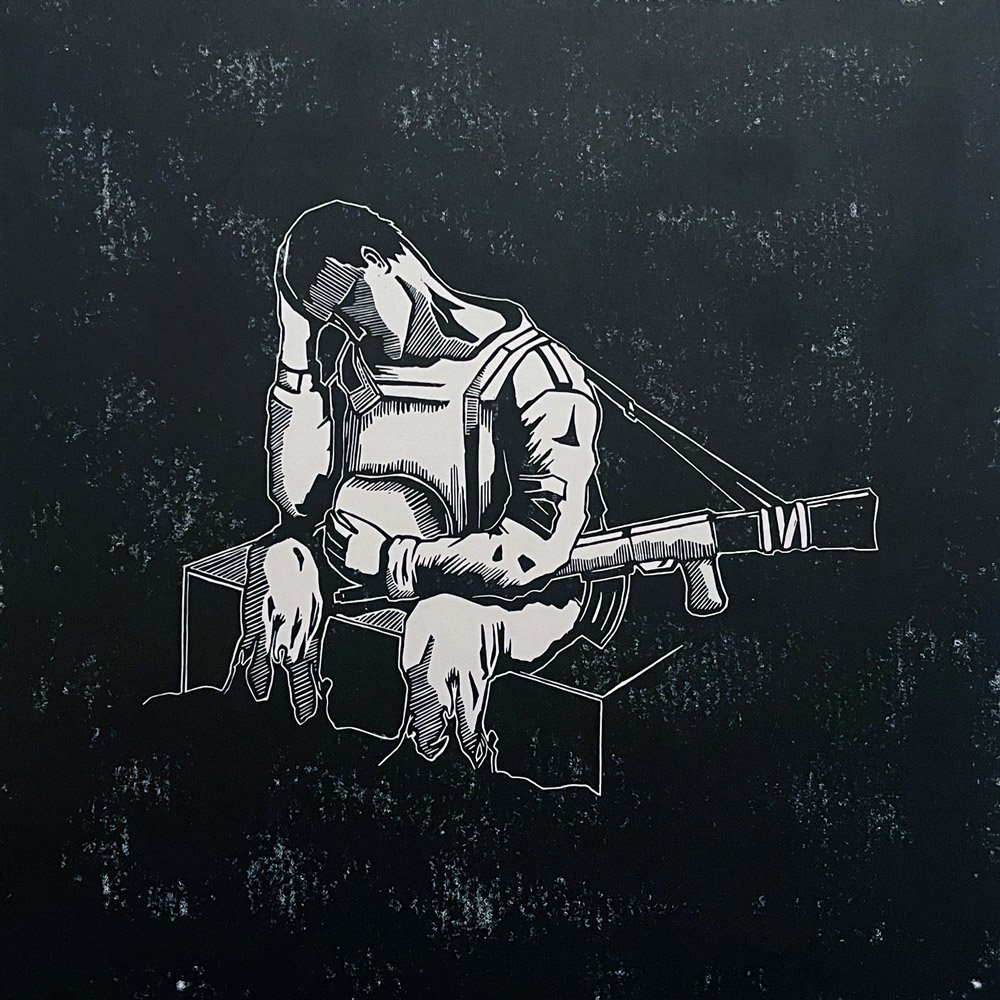
Monsters From The ID – Linocut on Zerkall Paper

What Tools Do I Need for Lino Printing?

Below, we’ve compiled a list of essential tools to get you started with lino printing. From carving tools to rollers, these pieces of lino printing equipment will help you achieve sharp lines, vibrant prints, and make the process much more enjoyable. Whether you’re a beginner or looking to expand your toolkit, this list covers everything you need. Read our guide about lino printing equipment explained.

  • Linoleum Block: This is your canvas.
    • My Preference: Traditional grey lino backed with Hessian fabric. It holds fine detail beautifully and is very durable.
    • Beginner Recommendation: Start with softcut lino. It’s much easier to carve and more forgiving, which is perfect when you’re learning.
  • Lino Cutting Tools: These are your carving instruments. They come with various blade shapes, like V-shaped and U-shaped gouges, for different textures.
    • My Preference: Pfeil cutting tools. They are a Swiss-made investment, offering incredible precision and quality.
    • Beginner Recommendation: Essdee lino cutting tools are a fantastic starting point. They offer a great balance of quality and affordability.
  • Lino Printing Ink: This is your color.
    • My Preference: Cranfield Caligo Inks. They have the rich, vibrant pigment of oil-based inks but are water-soluble, making cleanup a breeze with just soap and water.
    • Beginner Recommendation: The same! Caligo inks are perfect for home use and worth the small investment.
  • Paper: The surface for your final print.
    • My Preference: Lightweight printmaking paper, between 60gsm and 160gsm. Heavier paper is difficult to print on by hand.
    • Beginner Recommendation: Don’t overthink it at the start. Standard cartridge paper from a home printer works surprisingly well and is readily available.
  • Printmaking Brayer (ink roller): For applying ink to the block.
    • My Preference: A Japanese soft rubber brayer.
    • Beginner Recommendation: The Essdee red handle rollers are affordable, effective, and perfect for beginners.
  • Baren / Wooden Spoon: To apply pressure and transfer the print.
    • My Preference: A glass Iron Frog Baren. It provides even, consistent pressure.
    • Beginner Recommendation: A sturdy wooden spoon from your kitchen works perfectly well when you’re starting out.
  • Inking Plate (Glass or Perspex Sheet): A smooth, non-porous surface for rolling out your ink.
    • My Tip: I use old glass shelves from a fridge. They are durable and easy to clean. Any flat sheet of glass or perspex will do.
  • Palette Knife: For getting ink out of the pot and mixing it.
    • My Tip: A simple, flexible metal palette knife is all you need.
  • Pencil and Carbon Paper: For designing and transferring your image.
    • My Tip: Use carbon paper for an accurate transfer, or draw directly onto the lino with a permanent marker.

The tools and materials needed for this guide

Most of the resources needed for the lino printing process are relatively inexpensive, here at Hickman Design we sell a range of printmaking equipment and beginner-friendly lino printing kits that include all the essential tools and materials for lino printing for beginners.


A great video on the lino printing process by EHollingsheadArt

How to Make a Linocut – The Lino Printing Process Step by Step

Let’s get printing! Follow these steps for a successful first print. For those who want to dive deeper, each step includes a link to a more detailed guide.

1. Gather Your Materials

Start by collecting all the necessary materials for lino printing. Having everything within reach makes the process much smoother. If you’re unsure what materials are essential, check out our complete material guide for lino printing.

Next, let’s prepare your workspace to ensure everything is set up correctly.

2. Prepare Your Workspace

With your materials ready, ensure your workspace is clean, well-lit, and protected with a covering.

  • Protect Your Surface: Lay down newspaper or a plastic sheet.
  • Good Lighting: A well-lit space is crucial for carving safely.
  • Safety First: Always carve away from your body and keep your fingers behind the cutting tool.

For more tips, refer to our guide on preparing your workspace or studio.

Once your workspace is ready, it’s time to focus on your design.

3. Design Your Linocut

Now that your workspace is prepared, begin sketching your design on paper.

  • Keep it Simple: For your first print, choose a simple design with bold shapes and lines.
  • Remember the Mirror Image: Your printed image will be a mirror image of your carved block.
  • Positive and Negative Space: Think about what you will carve away (negative space) and what you will leave (positive space).

If you need help, check out our guide to designing your lino print or our guide for lino print ideas for beginners.

After you have your design ready, it’s time to transfer it onto the linoleum block.

4. Transfer Your Design

With your design complete, the next step is transferring it onto your linoleum block. Place carbon paper on the lino, place your drawing on top, and trace over the lines with a pencil. For a detailed walkthrough, see our guide on transferring your design onto your block.

Once your design is on the block, let’s move on to carving.

5. Carve the Lino Block

Using your lino cutting tools, carefully carve out the negative space of your design.

  • Start with the Outlines: Use a V-shaped gouge for fine lines.
  • Clear Away Larger Areas: Use a U-shaped gouge for larger sections.
  • Take Your Time: Carving is a slow, meditative process. Don’t rush it!

Our how to carve your linoleum blocks guide offers more detailed techniques.

With the carving done, let’s get ready for inking.

6. Ink the Block

After carving, it’s time to apply ink.

  • Squeeze Out Ink: A pea-sized amount is a good start.
  • Roll Out the Ink: Use your brayer to roll the ink into a thin, even layer on your glass sheet. You’re looking for a velvety texture.
  • Ink the Block: Roll the inked brayer evenly across the raised surfaces of your block.

For more detailed techniques, read our guide on inking your block. If you’re interested in printing in multiple colours, explore our masking technique for multi-colour printing.

Once your block is inked, it’s time to print your design.

7. Print Your Design

This is the moment of truth!

  • Position Your Paper: Carefully place the paper onto your inked block.
  • Apply Pressure: Use a baren or the back of a spoon to apply firm, even pressure in circular motions across the entire back of the paper.
  • The Reveal: Gently peel the paper back from one corner to reveal your print!

For more details, check out our guide on printing your linocut.

Once your print is done, let’s move on to drying and cleaning up.

8. Dry and Clean Up

  • Drying: Place your print somewhere safe to dry. Depending on the ink and paper, this can take anywhere from a few hours to a few days.
  • Cleaning: Clean your tools and inking plate immediately with warm, soapy water (if you’re using water-soluble inks).

Follow our lino print cleaning guide to ensure everything is ready for future projects.

Troubleshooting Common Lino Printing Problems

  • Patchy or Faint Prints: You may not be using enough ink or applying enough pressure.
  • Smudged Prints: You may be using too much ink, or the paper may have slipped during printing.
  • Ink in the Carved Areas: You are likely using too much ink. Roll out a thinner layer on your plate.

If your prints are coming out smudged, faint, or marked where they shouldn’t be, don’t worry! Head over to our short Lino Printing Troubleshooting Guide for easy fixes to the most common issues. With a few adjustments, you’ll be back to pulling crisp, beautiful prints in no time.

Designing and cutting linocut

Lino Printing Resources

This section offers additional resources and detailed guides for further reading on lino printing. You’ll tutorials on lino printing equipment and techniques that assist you at every stage of your journey. From choosing the right lino printing tools and materials to mastering various carving and printing methods, our guides provide valuable information to enhance your skills. Whether you’re a beginner or looking to refine your techniques, these resources will support you in improving your craft.

Disposing of Old Lino

Click here to find out about disposing old lino.

Printmaking Books

Click here to find books on printmaking.

Lino Printing Artists

Click here to find lino printing artists.

Printmaking Presses

Click here to find out about printmaking presses.

Lino Printing Articles

Multicolour Lino Printing Methods

Multicolour Lino Printing Methods

Multicolour lino printing allows for creative freedom and vibrant designs,…
Block Printing and Relief Printmaking Methods

Block Printing and Relief Printmaking Methods

Block printing, or relief printmaking, is a captivating and historic…

Finding Inspiration: Designing for Linocut

Staring at a blank lino block can be intimidating. The key to a great print is a strong design that works with the medium, not against it.

  • Look for Strong Shapes: Lino printing excels at bold, graphic images. Look for inspiration in nature (leaves, flowers, animals), architecture (windows, doors, patterns), or even everyday objects.
  • Simplify Your Subject: You don’t need to capture every single detail. Learn to simplify complex images into their core shapes and lines. Think about what makes the subject recognizable.
  • Balance Positive and Negative Space: A good design has a thoughtful balance between the areas you carve away (negative space) and the areas you leave behind to print (positive space). Sketch your ideas first and shade in the areas you plan to leave. This helps you visualize the final print.
  • Embrace Texture: Use different carving tools to create textures. A V-gouge is great for fine lines, while a U-gouge can create interesting patterns and clear larger areas.

Check out our short guide for 10 ideas to help get you started with lino printing.

Beyond Paper: Printing on Other Surfaces

Once you’ve mastered printing on paper, a whole new world of projects opens up.

  • Printing on Fabric (Tote Bags, T-Shirts): This is a very popular next step. You will need to use fabric-specific block printing ink, which is designed to be permanent on textiles. After the ink is fully dry (check the manufacturer’s instructions), you’ll usually need to heat-set the design with an iron to make it washable.
  • Making Greeting Cards & Stationery: You can buy blank pre-folded cards or use thicker paper like cardstock. This is a wonderful way to create personalized gifts.
  • Printing on Wood or Cork: You can print on smooth, unfinished wood slices or cork coasters for a rustic look. Ensure the surface is clean and dust-free before printing.

Caring For Your Lino Printing Tools

Your tools are an investment. With proper care, they can last a lifetime.

  • Clean Immediately After Use: Don’t let ink dry on your brayers or carving tools. For water-soluble inks, warm soapy water and a soft cloth are all you need.
  • Dry Thoroughly: Moisture is the enemy of metal tools. After washing, dry your cutter blades completely to prevent rust.
  • The Importance of Sharpening: Over time, your carving tools will become dull. A dull tool is harder to use, less safe, and produces messy lines. Learning to sharpen your tools with a sharpening stone and leather strop is a key skill for any serious printmaker. It will make your carving experience much more enjoyable and your results more professional.

A Glossary of Lino Printing Terms

  • Artist’s Proof (AP): A small number of prints pulled before the main edition, for the artist’s personal use.
  • Baren: A disc-like tool used to apply pressure to the back of the paper to transfer the ink.
  • Brayer: The hand-roller used to apply ink to the lino block.
  • Edition: A set of identical prints made from the same block. They are usually numbered, for example, 1/50.
  • Gouge: The cutting blade of a lino tool. They come in different shapes, like “V” and “U.”
  • Negative Space: The areas of the block that are carved away and will not print (they will be the colour of the paper).
  • Positive Space: The raised areas of the block that are left behind, inked, and will form the printed image.
  • Registration: Any method used to align the paper and block to ensure prints are consistent, especially crucial for multi-colour printing.
  • Relief Print: A print made from a raised surface where the non-printing areas have been cut away.

Lino Printing FAQ

  • Is lino printing the same as block printing? Yes and no. Lino printing is a type of block printing. For more detail on the broader category, see our guide on block printing and relief printmaking methods.
  • Lino Printing vs. Woodblock Printing: What’s the real difference? The key difference is the material, which affects the entire process and final look.
    • Material: Linoleum is a soft, flexible material with no grain. Wood is harder and has a natural grain.
    • Texture: Lino produces clean, sharp, and often bold lines. Woodblock prints can have a more rustic, textured appearance as the wood grain can become part of the print.
    • Ease of Use: Lino is much easier to carve, making it ideal for beginners. Wood requires more force, skill, and specialised (often more expensive) tools.
  • Why did my print come out backward? This is the most common “mistake” for beginners! The printmaking process creates a mirror image of what you carve. The block you carve is a direct reflection of the final print. This is especially critical to remember for any designs that include text or are asymmetrical.
    • Pro Tip: To avoid this, always flip your design before you transfer it to the block. You can do this easily with tracing paper or any basic photo editing software.
  • What’s the best ink for a beginner: water-based or oil-based? Both have their pros and cons, but for beginners, water-soluble oil-based inks like Cranfield Caligo are often the best of both worlds.
    • Water-Based Inks: Dry very quickly, which can be frustrating as they can dry on your inking plate while you work. However, they are affordable and clean up very easily with just water.
    • Oil-Based Inks (Water-Soluble): Give you the rich, vibrant colours and longer working time of traditional oil inks, but they clean up easily with soap and water, so you don’t need harsh chemical solvents.
  • How do you make multi-colour lino prints? This is an advanced technique, but there are two primary methods. For a deep dive, check out our guide to multicolour lino printing methods.
    1. The Reduction Method: Often called the “suicide print,” you use a single block. You carve and print your first (lightest) colour, then carve away more of the same block and print the next colour on top of the first prints, and so on.
    2. The Multi-Block Method: You carve a separate block for each colour you want to print. This requires a precise registration system to make sure each block lines up perfectly when printed.
  • Can you lino print at home? Absolutely! That’s one of its main appeals. You don’t need a large, expensive press or a dedicated studio to get started. A kitchen table, a few basic tools, and some creativity are all you need.
  • Why is linocut sometimes criticized? Historically, some in the fine art world viewed it as less sophisticated than techniques like etching or lithography, partly because the materials are less expensive and the process is more accessible. However, this is an outdated view. Linocut is a respected and versatile medium used by famous artists like Picasso and Matisse and celebrated by contemporary artists worldwide for its bold, graphic qualities.
  • Is lino printing good for GCSE or school art projects? Yes, it’s a fantastic choice for school projects. It’s often included in the curriculum because it’s accessible, relatively low-cost, and teaches core art principles like positive/negative space, composition, and mark-making.
    • Materials: Schools typically use softcut lino and water-based inks for safety and easy cleanup.
    • Tip for Students: To make your project stand out, focus on a strong, original design. Experiment with mark-making to create different textures, and don’t be afraid to try printing on different coloured or textured papers. A well-executed, thoughtful print will always impress.

If you want to make it even more eco-friendly, try our Sustainable Printmaking Guide.

Your Next Print Awaits: Final Thoughts and Next Steps

Congratulations on taking your first steps into the world of lino printing! By following these basic techniques and tips, you’re already well on your way to producing eye-catching linocuts from the comfort of your home. As you continue experimenting, remember that each carved block and proof print is a new learning opportunity. Don’t be afraid to explore different inks, papers, or even multi-colour methods as you build confidence.

If you run into any stumbling blocks, smudged edges, faint impressions, or stray marks – take a look at our Lino Printing Troubleshooting Guide for easy fixes. We also have more resources on advanced techniques if you’re eager to expand your repertoire. Most importantly, have fun, embrace the creative process, and watch your unique style unfold with every print you pull. Happy printing!

Last Updates Published: July 02, 2025

Luke Hickman

Author at Hickman Design

Luke Hickman is a printmaker and artist with over 15 years of experience, specialising in fine art printmaking methods such as lino printing, screen printing, and etching. He studied at Norwich University, graduating with a BA (Hons) Fine Art, and has worked in both the commercial printing and digital marketing industries for over 7 years. Luke’s work revolves around the idea of creating art that can illustrate a story, with topics covering war, politics, and history. His expertise in traditional printmaking techniques allows him to create unique, hand-crafted pieces that blend contemporary themes with time-honored processes. In addition to his artistic pursuits, Luke also writes about digital marketing and SEO at Bird Marketing, sharing his knowledge and experience to help businesses succeed online.

Read Full Bio