When I started exploring lino printing, I found it to be an accessible and rewarding art form. It requires a few basic tools and materials, like a lino cutter and ink, making it easy for anyone to get started without much investment.
Lino printing allows for creativity and experimentation, which can produce wonderful and unique art pieces.
Many beginners feel overwhelmed by the variety of techniques and designs available.
To simplify this journey, I have gathered some inspiring ideas that are perfect for those new to lino printing. These ideas will boost your confidence and help you create your first successful prints.
Table of Contents
Monochrome Landscape Prints
When I first started with linocuts, monochrome landscape prints were a fantastic choice.
The simplicity of a single colour helps to focus on carving techniques. By removing the complexity of multiple colours, I find it easier to concentrate on details like texture and contrast.
To begin, I select a landscape photo with interesting outlines and shapes. Using just black ink against white paper can create a striking image.
The monochrome format forces me to think creatively, finding ways to suggest depth and atmosphere using only shades of black and white.
I use variations in line thickness to achieve different effects. Thicker lines can suggest shadow or depth, while thinner lines can create fine details.
I also explore patterns to add interest and movement to the print.
For beginners, this approach offers a rewarding learning experience. I recommend starting simple and gradually exploring more complex landscapes. With practice, I can capture the beauty of a scene with minimal elements.
Experimenting with texture is important, too. The way I carve the lino determines the texture of different elements, like trees, water, or mountains. I enjoy trying different techniques to mimic these natural textures.
Monochrome landscapes can be displayed prominently due to their bold and classic look. Whether it’s a dramatic mountainscape or a serene countryside, the elegance of a single colour scheme often speaks volumes.
For more ideas on starting linocut projects, check this out.
2. Animal Silhouette Designs
Animal silhouette designs in lino printing offer a simple yet striking way to create art.
I choose an animal that fascinates me and focus on its outline. Bold shapes and clear lines make these designs stand out.
To start, I sketch the animal onto the lino block. I ensure the design is clear and recognisable.
Common choices include cats, birds, and fish, but any animal can work.
When carving, I pay attention to the edges of my design. Clean lines are essential for a successful print.
I use different tools to achieve the desired effect, varying the pressure for thicker or thinner lines.
I find that animal silhouettes are versatile. They can be used for various projects, from greeting cards to framed art. With some creativity, I can adapt them for any occasion.
The simplicity of these designs allows me to experiment with different colour combinations.
By using contrasting colours, I make my prints more visually appealing and dynamic.
The simplicity of silhouettes also offers room for creative backgrounds or patterns, adding more depth to the final piece.
By focusing on animal silhouettes, I can create striking artworks that are both simple and captivating.
3. Simple Floral Patterns
When I start with lino printing, simple floral patterns are my favourite. Flowers offer a wide variety of shapes and can be as basic or detailed as I like.
I usually begin by sketching out a simple flower, such as a daisy or tulip, on paper to plan my design.
I find that using bold outlines works well for beginners. It helps to carve out the main lines clearly in the linoleum block.
The key is to keep the design simple yet recognisable. A few petals and a central disc can make an effective flower pattern.
When carving, I focus on creating clean lines.
I’ve learned that practice makes the lino printing process smoother, so I take my time to get the details just right.
It’s helpful for me to inspect the design from different angles to ensure consistency and balance.
Inking can bring the floral pattern to life. I like to use vibrant colours to make the flowers pop against the background.
Experimenting with different colours can create unique effects, adding depth to the prints.
For inspiration, I often look for easy flower lino print ideas that other artists have tried.
Observing the work of others can spark new ideas and techniques to explore in my own projects.
By starting with simple motifs, I build my skills and confidence before moving on to more complex designs. Even basic floral patterns have the potential to become striking pieces of art when printed with care.
4. Abstract Geometric Shapes
When I explore abstract geometric shapes in lino printing, I focus on simple forms like circles, triangles, and squares.
These basic shapes can be combined in endless ways to create visually striking designs.
I find that using geometric patterns allows me to express ideas and emotions through balance and repetition.
In my experience, choosing a limited colour palette when working with geometric shapes enhances the visual impact.
Contrasting colours can highlight the shapes and add depth to the print.
Using bold colours against a neutral background can make the design stand out even more.
I often experiment with varying sizes and arrangements of shapes. Overlapping and intersecting shapes can create a sense of movement and energy.
Playing with symmetry and asymmetry is another way to make interesting compositions.
Creating abstract geometric designs allows for flexibility.
I can change my design spontaneously, without being constrained by realism.
This freedom helps me focus on the elements of pattern, contrast, and rhythm.
For those new to lino printing, starting with simple geometric shapes can be a rewarding experience.
It offers a perfect platform for developing skills in carving and inking, while also allowing personal creativity to flourish.
Nature Inspired Motifs
Nature has always been a source of inspiration for art, and lino printing is no exception.
I find that using motifs from the natural world can bring a unique beauty and simplicity to my prints.
Leaves are a popular choice. They come in many shapes and sizes, allowing for both simple and intricate designs. Patterns from leaves can create striking visual effects.
Flowers provide vibrant and delicate designs. By focusing on the different parts of the flower, such as petals and stems, I can create varied designs that capture the elegance of nature.
Birds offer a dynamic element to lino prints. Their wings, beaks, and feathers provide interesting shapes for experimenting with textures and lines.
Water creatures like fish and seashells add an aquatic theme. The flowing lines and curves of these elements can give my prints a sense of movement and rhythm.
Trees and branches are essential motifs in any nature-inspired design. They offer bold lines and intricate patterns that can be both calming and dramatic.
For anyone looking to explore nature in art, Pinterest offers ideas to get started.
Also, books like Nature Imprinted provide step-by-step guidance for creating nature-inspired designs.
Whether you choose leaves, flowers, or fish, these ideas form a versatile base for anyone interested in lino printing.
Bold Typography Creations
When it comes to linocut printing, incorporating bold typography offers a unique twist.
I often find that carving striking letters into the lino block adds a graphic impact that draws immediate attention. It’s a great technique to personalise greeting cards or posters.
I start by selecting a font with strong, clean lines. It’s essential to choose a font that is not too intricate for easy carving.
After tracing the design onto the lino, I carefully carve out the spaces around the letters, leaving the typography raised. This allows the letters to be inked and printed clearly.
Inking the carved lino block requires consistent pressure to ensure even ink coverage.
Using a brayer is helpful to achieve this.
Once inked, I press the block onto the paper, creating a bold typographic image that stands out.
Experimenting with different colours can also elevate the final print.
I sometimes layer colours for a more dynamic effect. The key is in the careful alignment of each layer to maintain clarity in the text.
Creating bold typography prints enables me to deliver both artistic and communicative messages.
It’s a rewarding approach that combines the visual impact of linocut with the expressive potential of words.
It’s a favourite technique when aiming for a blend of art and language.
7. Seasonal Greeting Cards
I enjoy creating handcrafted seasonal greeting cards using lino printing. It’s a fantastic way to personalise festive messages for holidays like Christmas, Easter, or Halloween. With lino printing, I can craft unique designs that stand out.
The process begins by choosing a seasonal motif. For Christmas cards, I might carve Christmas trees or snowflakes. Easter cards could feature bunnies or eggs, while pumpkins or leaves work well for Halloween.
After selecting a design, I sketch it on a piece of lino. Then, I carefully carve away the negative spaces, leaving the design raised. This gives each card a distinctive handmade look. Each step requires patience and attention to detail.
Once carved, I apply ink to the lino. I use a roller to ensure even coverage.
After that, I press the inked lino onto a card, transferring my design. Each card maintains its own character, offering a personal touch.
Creating seasonal cards with lino printing is not only fun but also a creative outlet.
It allows me to send heartfelt greetings, sharing a piece of art that I’ve made.
For those interested in giving it a try, tutorials like those on Dictum Blog and Sarah Ransome Art can be very helpful.
8. Minimalist Portrait Illustrations
When I create minimalist portrait illustrations, I focus on capturing the essence of a subject with just a few lines and shapes. This style emphasises simplicity and elegance, allowing the few details used to stand out.
It’s a great way to practise drawing skills without getting bogged down by complex features.
I often start by selecting a photo that already has strong lines and clear features. This makes it easier to highlight the essential elements of the subject.
Tracing basic outlines helps in translating the photo into a minimalist style. Removing unnecessary details is key to achieving the desired simplicity.
For those interested in digital art, this style is very suitable. Programmes like Adobe Illustrator or Procreate offer tools that make drawing these portraits easier.
By using layers, I can sketch, refine, and finalise my work with efficiency. This digital approach also offers the flexibility to experiment with colours and textures.
Minimalist portraits can be adapted for various purposes. They work well for personal projects, like creating a unique profile picture or a personalised gift.
They can also be used for professional projects such as wedding invitations or decorative prints.
This versatility makes minimalist portraiture a valuable skill in any artist’s toolkit.
Retro Style Prints
When I explore retro-style lino prints, I tap into a classic look from past eras. This style features bold lines and striking patterns, often inspired by art movements like Art Deco or mid-century design.
The appeal is in its nostalgia and the way it captures the essence of a bygone era.
I start by choosing simple shapes and strong contrasts for my retro prints. Designs often include geometric patterns, stylised figures, or vintage objects.
It’s essential to focus on clarity and simplicity, which are key elements in achieving an authentic retro look.
To create retro prints, I use a limited colour palette with bold shades. Colours like mustard yellow, teal, and burnt orange can help in recreating that nostalgic feel.
The goal is to evoke a sense of time and place with each print.
Adding textures like cross-hatching or dots can give my prints a sense of depth. I often experiment with these techniques to see which work best for my design. This adds interest and makes the art stand out.
One of the great things about retro-style prints is their versatility. They can be used on posters, greeting cards, or fabric.
This range ensures that my prints can be both decorative and functional. I always look forward to exploring new ideas in this timeless style.
10. Cultural Iconography Designs
When I explore cultural iconography designs in lino printing, I am drawn to the rich symbols and motifs from various cultures. These designs can include traditional patterns, religious symbols, or iconic figures that hold cultural significance.
I find that by using cultural iconography, I can create prints that resonate with a wide audience. The challenge is to honour these symbols while adding my artistic expression.
For beginners, starting with recognisable patterns or symbols from a specific culture can be both educational and inspiring.
In my experience, incorporating cultural iconography requires some research. You need a basic understanding of the cultural context to avoid misrepresentation.
Choosing the right colours and shapes can enhance the symbolic meaning of the prints. Using bold and simple designs ensures clarity and impact.
I see cultural iconography as a way to connect with different histories and traditions. This approach often leads to pieces that feel timeless and profound.
Experimenting with textures and layers can add depth to the cultural motifs. Combining traditional and modern elements can result in unique art pieces.
Understanding Lino Printing
Lino printing, a unique form of relief printing, holds a rich history and requires specific tools. These key elements help any beginner to start their creative journey in lino printing.
History of Lino Printing
Lino printing, or linocut, started in the early 20th century. Artists began using linoleum as a printing surface, due to its softness compared to traditional woodblocks.
This technique became popular for producing striking and bold images.
Famous artists like Pablo Picasso and Henri Matisse embraced lino printing, which helped cement its place in the art world. The method allowed artists to quickly make prints, making it suitable for both fine art and commercial purposes.
Today, lino printing is respected for its accessibility and ease for beginners.
Basic Materials Required
To start lino printing, a few essential materials are necessary.
I need a linoleum block, which is the surface for carving the design. A set of carving tools is crucial for shaping the linoleum. These usually include gouges of different sizes.
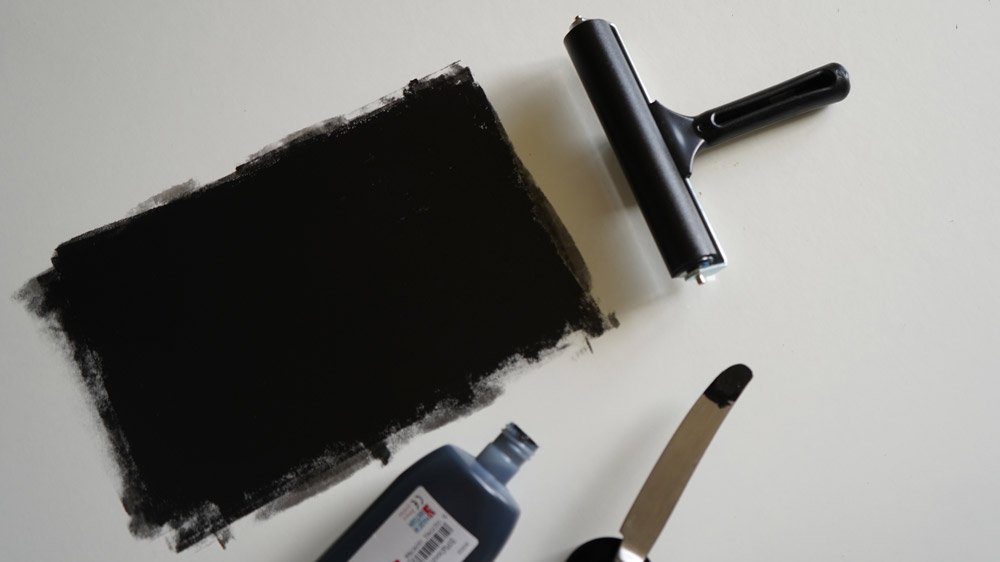
Ink for printmaking is important, often water-based, which I can roll onto the carved block with a brayer, or roller.
A barren or a wooden spoon helps apply pressure, transferring the inked design onto paper. Good quality printing paper is recommended to achieve the best results.
Additionally, safety equipment like a hand guard is wise to have to prevent accidents while carving.
Techniques for Beginners
As you start exploring lino printing, it’s important to grasp some basic techniques. I’ll guide you on how to use carving tools effectively and provide tips for inking and printing that will help ensure your artwork looks great. Whether you’re planning to create simple greeting cards or experimenting with more decorative items such as Custom Patches, understanding these fundamentals will give you a strong foundation to build on.
Carving Methods
Selecting the right tool for carving is crucial. I usually start with a V-shaped gouge for outlines because it offers precision and control.
For larger areas, a U-shaped gouge works well to remove more material quickly.
Holding your carving tool at the correct angle is important. I recommend tilting the gouge at about 30 degrees to prevent slipping.
Always carve away from your body to avoid injuries.
I also prefer using softer lino blocks when starting out since they’re easier to carve. Some people like heating the lino slightly with a hairdryer to soften it further.
It’s a helpful trick when you’re new to the craft.
Inking and Printing Tips
When it comes to inking, using a brayer is essential. I roll out a thin layer of ink on a glass surface until it makes a soft, tacky noise.
This sound indicates the ink is evenly spread.
It’s important to apply just the right amount of pressure. Too much might smear details, while too little may not capture the design properly.
I press evenly with my hands or use a baren.
If you’re using hand printing, place paper carefully over the inked lino. Firmly rub the back of the paper with a spoon or a baren to transfer the ink effectively, creating a clean print.
Frequently Asked Questions
I’ve gathered a range of common questions that beginners often have about lino printing. From easy project ideas to festive themes, there’s plenty of inspiration to get started.
What are some straightforward linocut projects for novices?
When starting with linocut, I recommend trying out monochrome landscape prints or simple floral patterns. These projects are not only easy but also help you learn the basic techniques of carving and printing.
Where can I find complimentary designs for linocut printing?
Many online resources offer free designs to help you begin your linocut journey. Websites like Hobbycraft provide essential techniques and starter templates that are perfect for beginners.
Can you suggest some animal-themed lino print ideas suitable for beginners?
Animal silhouette designs are a great choice for novices. They often have simple outlines and bold shapes that are easier to carve.
Try starting with popular animals like birds or cats to get comfortable with the process.
How can one create festive linocut art for Christmas?
Creating festive linocut art for Christmas can be both fun and rewarding.
Consider designs featuring Christmas trees, snowflakes, or reindeer. Using these elements, you can craft unique holiday cards or decorations.
What characteristics define an excellent linocut design?
An excellent linocut design typically has clear lines and contrast. The design should be bold enough to ensure that it stands out when printed.
Designs that incorporate negative space effectively are often successful in creating striking images.
Would you consider linocutting a worthwhile hobby for beginners?
Absolutely, linocutting is a worthwhile hobby for those new to printmaking. It’s accessible and requires minimal supplies. Plus, it allows you to create art with a personal touch.
You can develop your skills and produce impressive prints with practice.