Preparation of Your Work Area for Lino Printing
Before embarking on a lino printing project, ensuring that your workspace is clean, organised, and free from dust and debris is paramount. A well-prepared space not only promotes efficiency and precision but also ensures that your prints remain pristine and unblemished. Below are key steps to adequately prepare your work area for lino printing:
- Choose an Appropriate Space: Opt for a well-lit, ventilated area with a sturdy, flat table or bench. Avoid carpeted areas, as lino ink can stain them permanently.
- Deep Clean:
- Begin with a thorough cleaning of the workspace. Dust and wipe down all surfaces.
- Ensure there are no leftover materials or debris from previous projects.
- Sweep or vacuum the floor to avoid the inadvertent transfer of dust or fibres onto your lino or paper.
- Organise Tools and Materials:
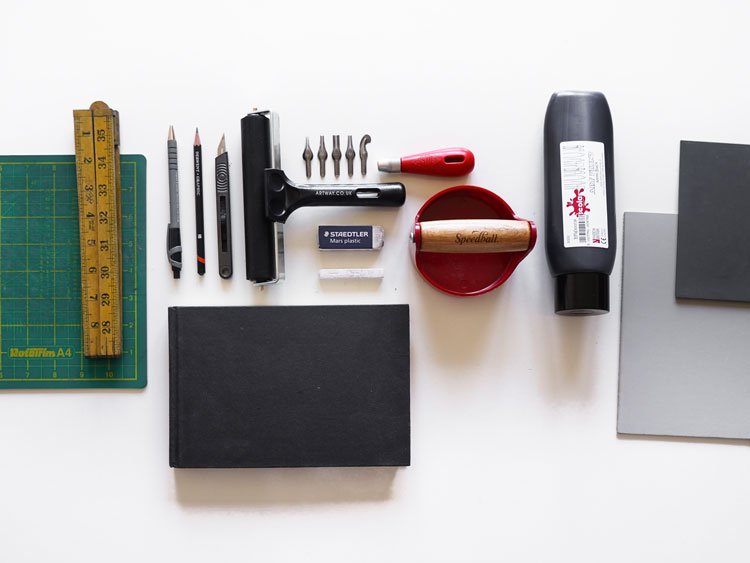
- Lay out all the necessary tools, such as lino cutters, rollers, and inks, in a logical order, ensuring they’re within easy reach.
- If you have a lino printing kit, organise all of the tools beforehand, as these kits provide a complete set, making it easier to keep everything together and accessible.
- Store sharp tools in a designated container to avoid accidents.
- Keep cleaning materials, like rags or paper towels, handy for quick wipe-downs.
- Prepare the Lino:
- Brush off any dust or particles from the lino surface using a soft brush.
- Ensure the lino is flat. If it’s warped, place it under a heavy book or use a warm (not hot) source like a hairdryer to soften it, then press it flat.
- I personally prefer to mount lino onto a block of wood or old foamex board to keep lino flat.
- Cut any loose hessian from the edges of back of the lino.
- Here is a short guide on how to flatten lino out that has bowed/curved.
- Dust-Free Environment:
- Consider using a dust sheet or cover to keep your work-in-progress protected when not actively printing.
- Ensure any open windows or vents don’t encourage the flow of dust or airborne particles onto your workspace.
- If you have pets, try to keep them away from the work area, as they can introduce both fur and dust.
- Hygiene:
- Wash your hands before starting. Natural oils and residue from your skin can interfere with the ink’s adherence to the lino or paper.
- Keep a damp cloth nearby to quickly clean your hands if they get ink on them, ensuring you don’t accidentally smudge your work.
Remember, the quality of your final print is significantly influenced by the condition of your workspace. By taking the time to properly prepare and maintain a clean and organised area, you’ll not only foster a seamless printing process but also ensure the creation of impeccable lino prints.
To get a full overview of the entire lino printing process, from design to inking and printing, you can explore the complete lino printing process on our comprehensive guide page.
Featured Linocut Guides
Check Out Our In Depth Lino Printing Guides


